Not at all! I will walk you through everything you need, step by step. Prior experience will however, aid you in moving through the course modules more quickly.
by Ronei Fagenello
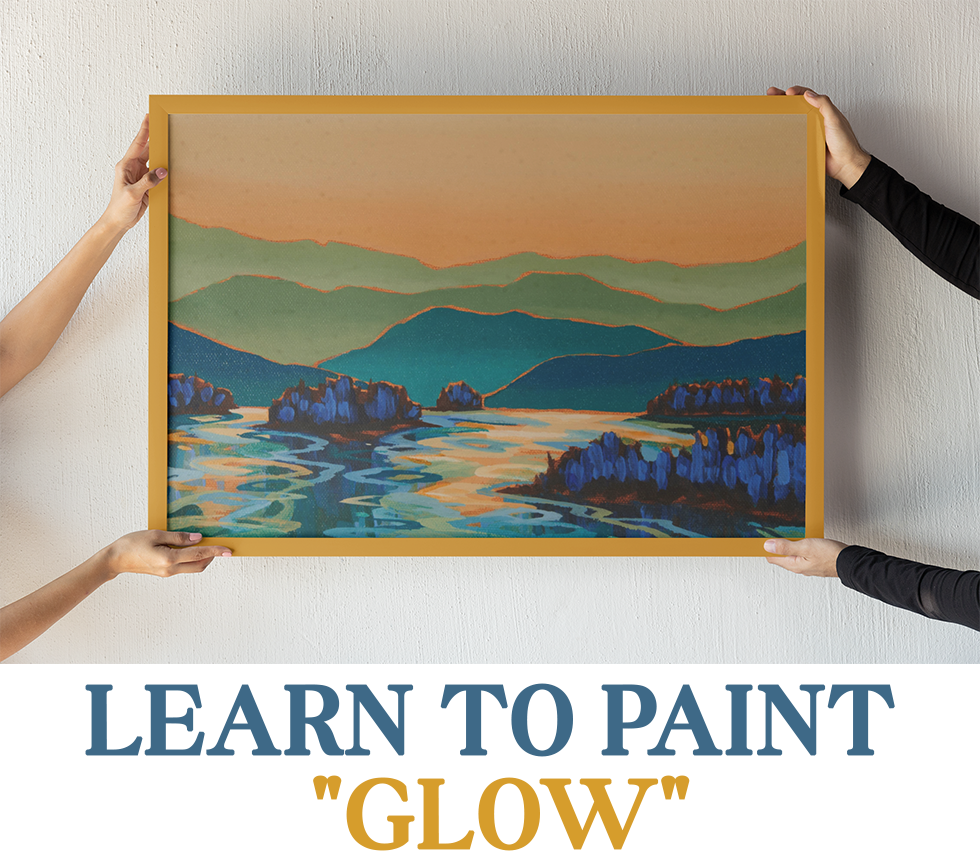
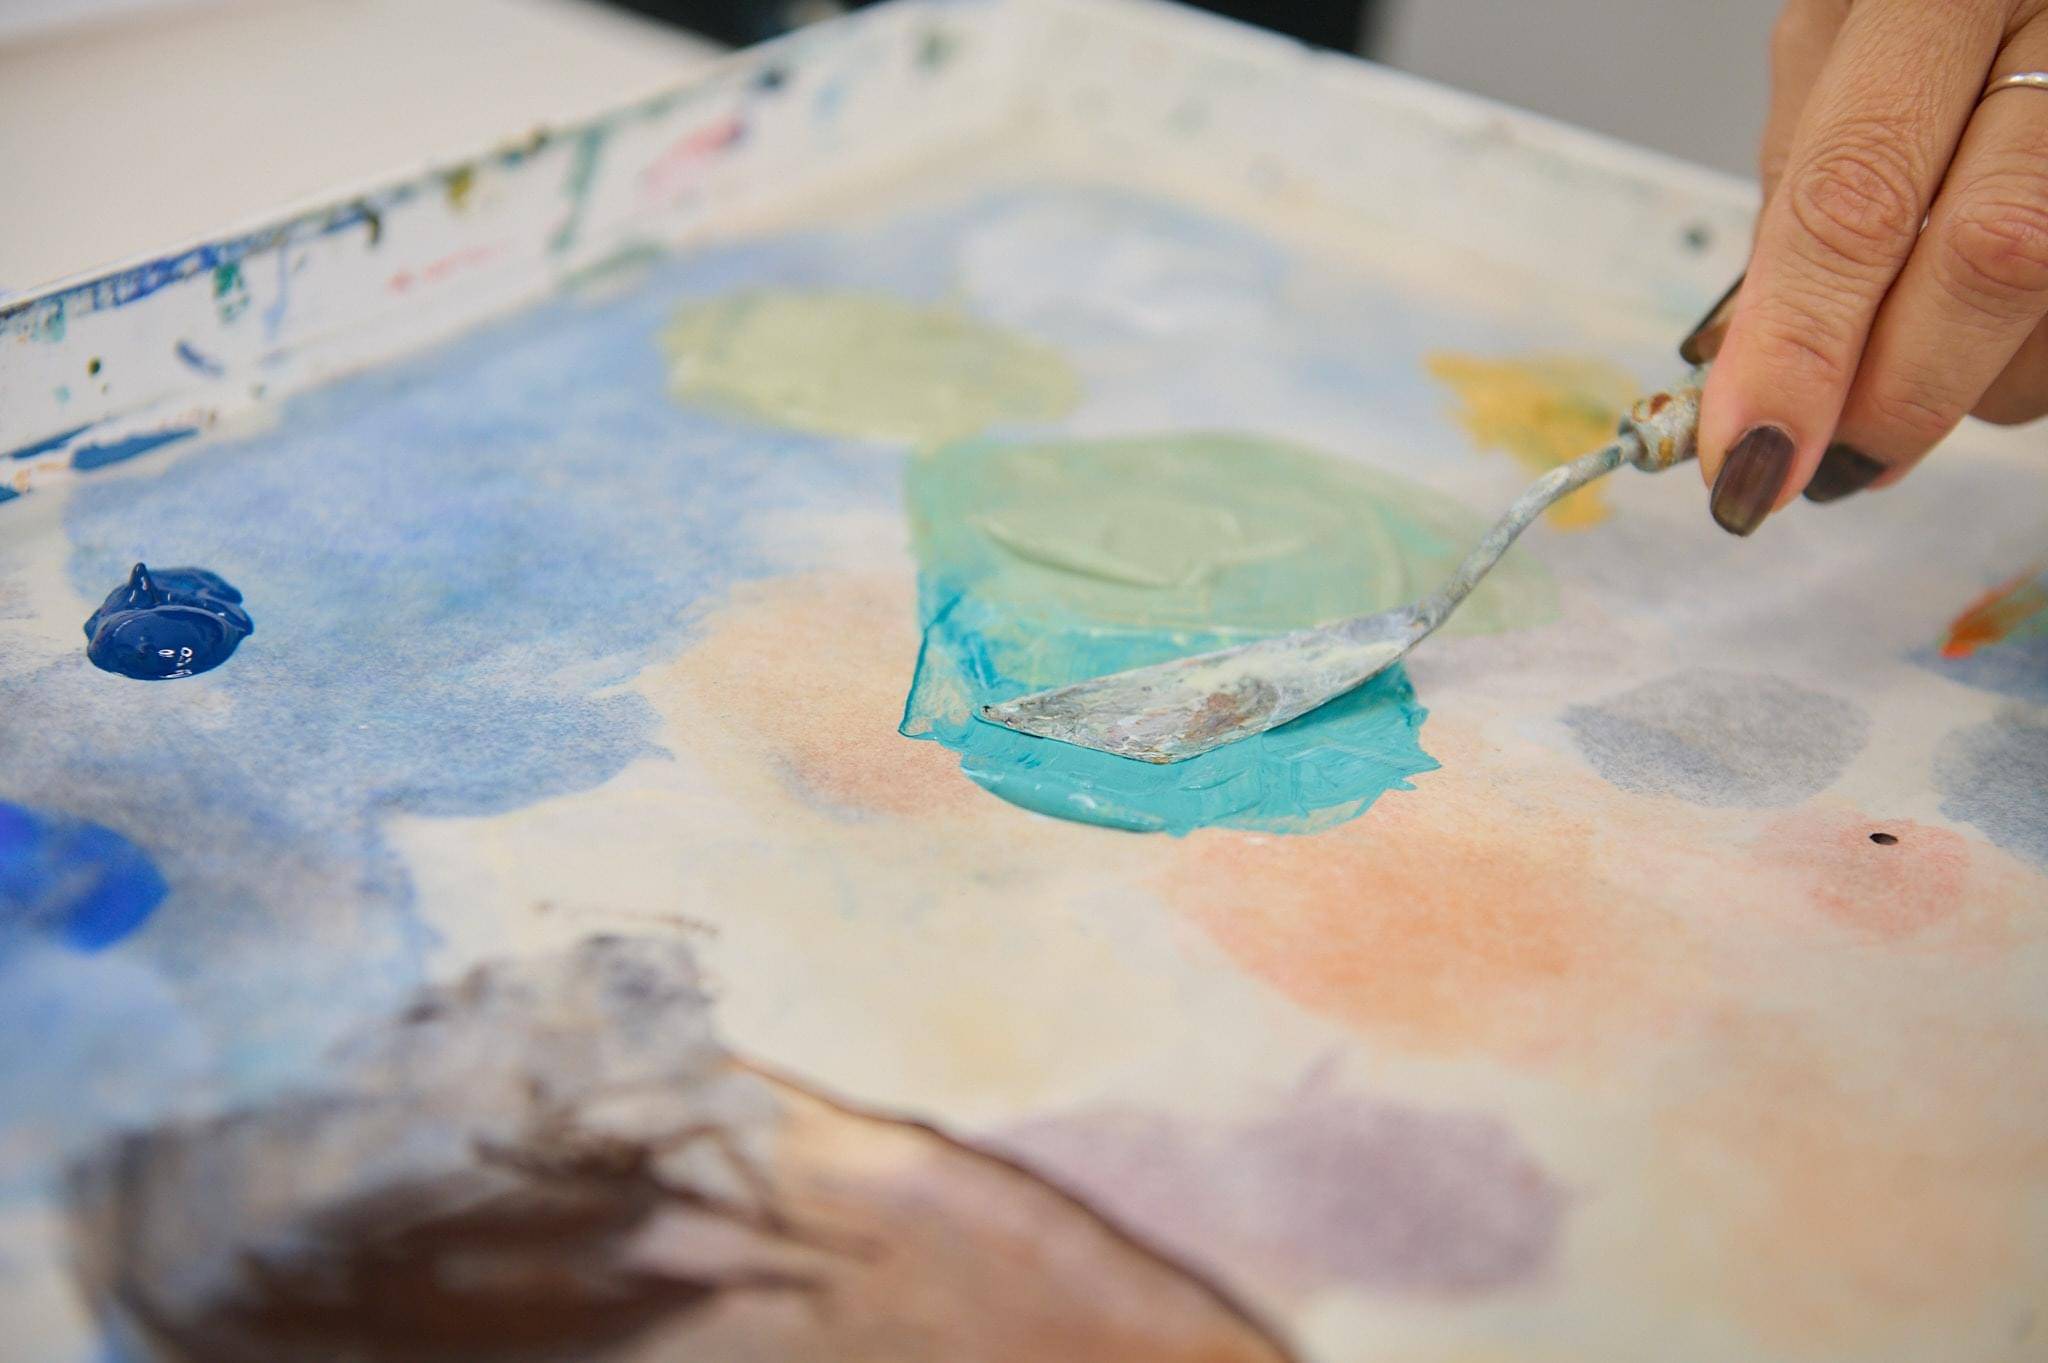
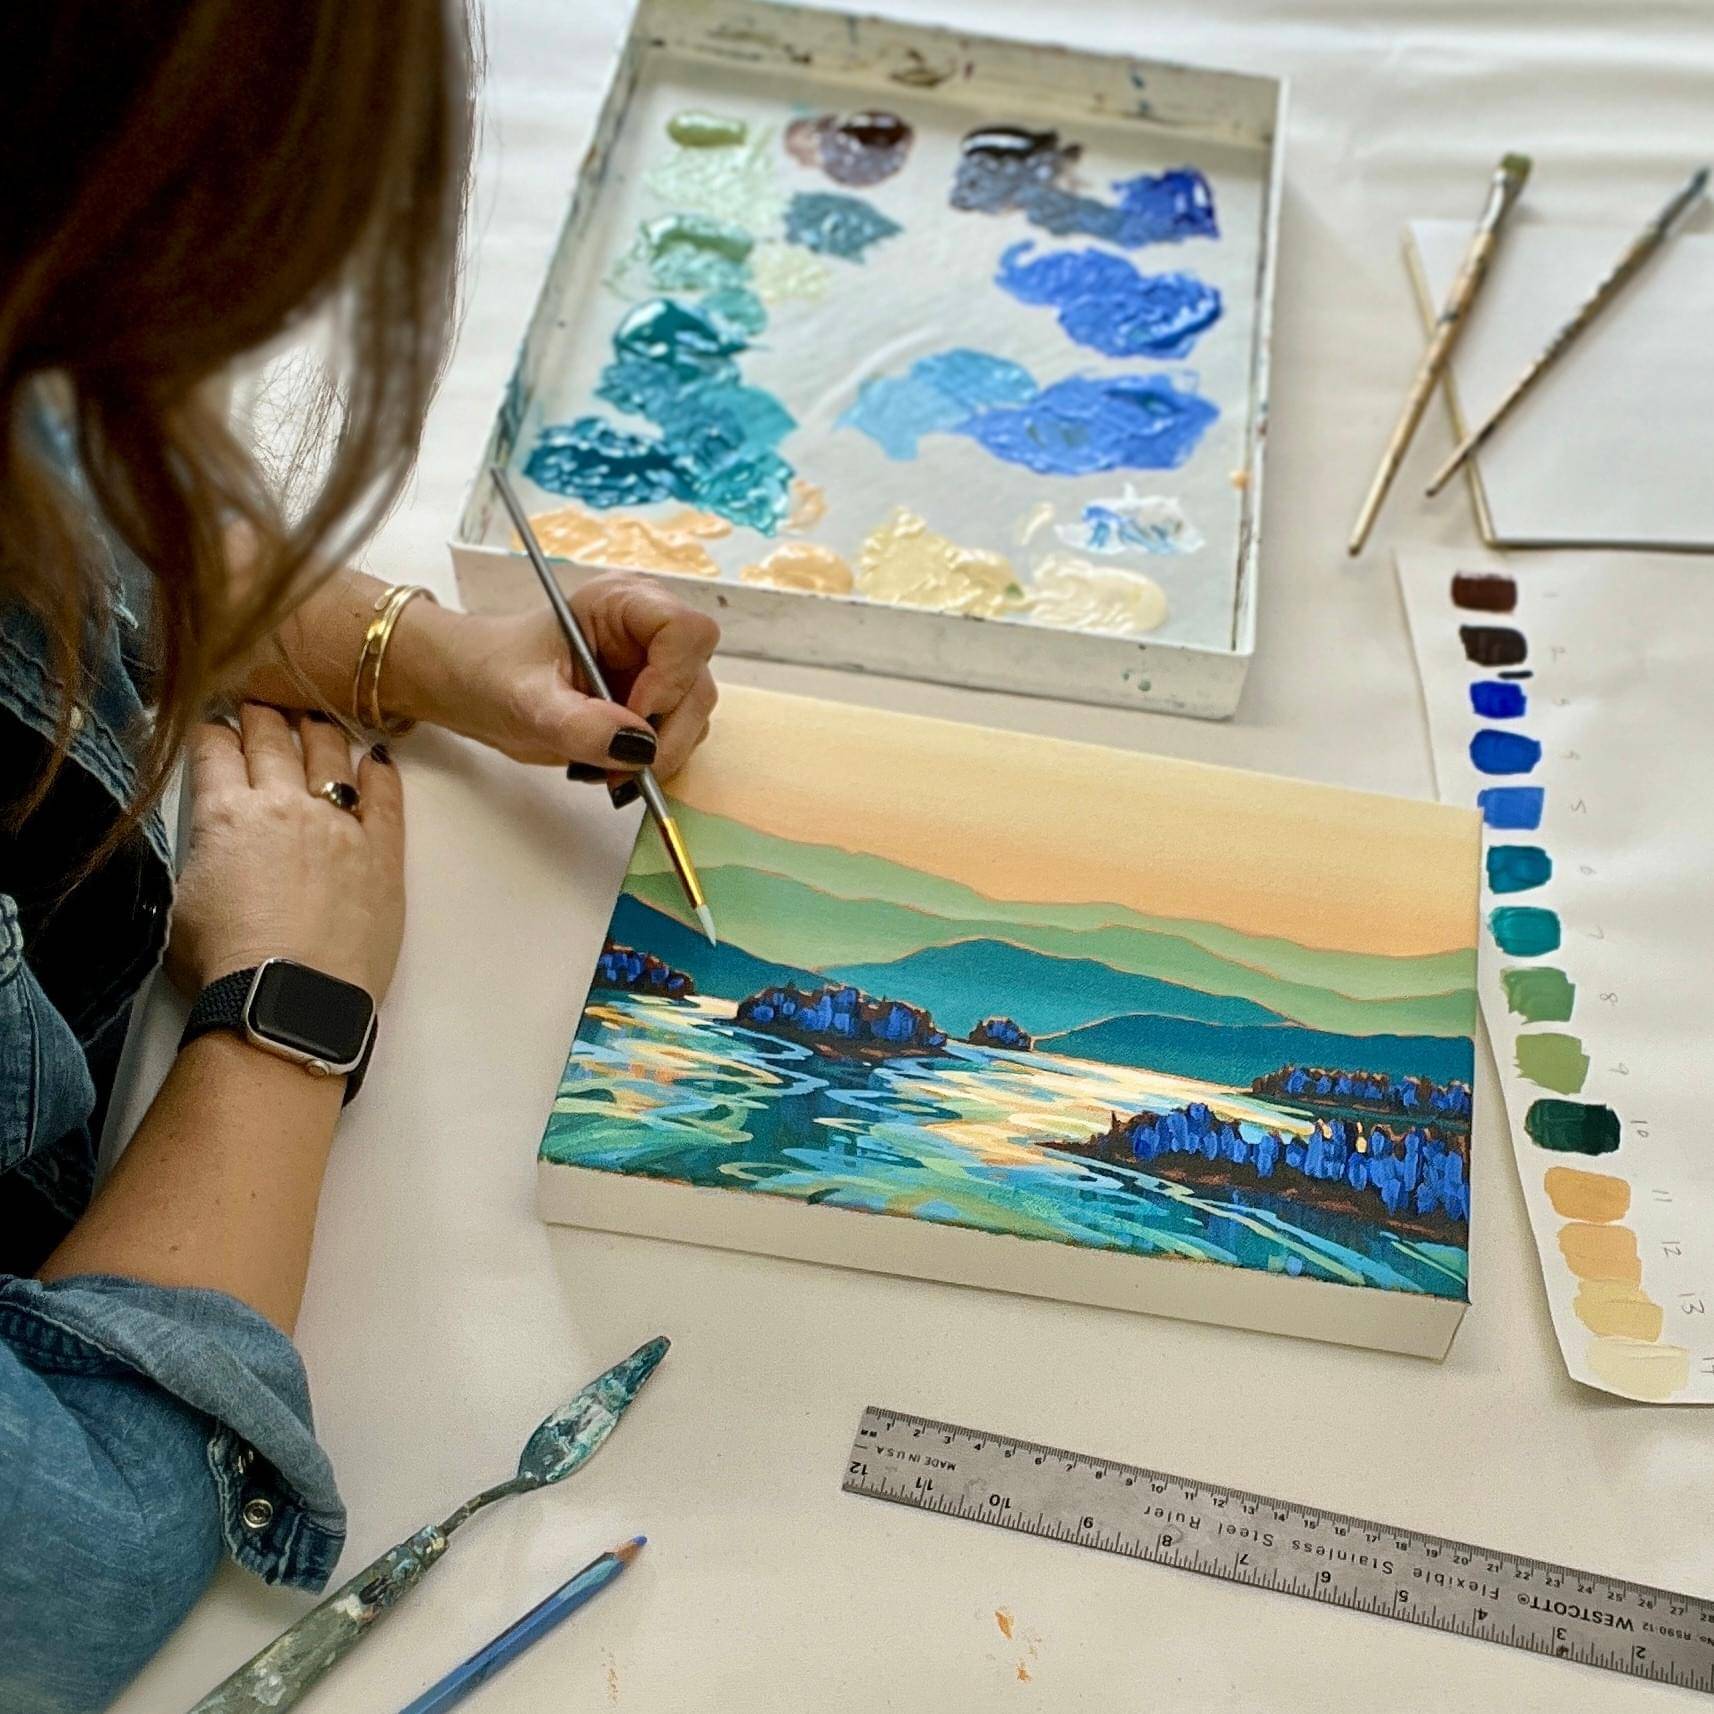
Craft your own signature West Coast landscapes, including misty mountains, glowing sunsets, and rippling ocean reflections - in 10 easy steps!
Effortlessly Paint Landscapes With Skies that "GLOW"
This simplified & FUN method will help you produce beautiful landscapes without the headache of figuring it all out alone - especially if you've never painted before!
Normally $67
🌷Spring Sale: $47
*All Prices Displayed Are In USD*
Your 10 step guide to creating an acrylic coastal painting that glows.

This painting class features iconic elements of the West Coast!
Such as tree-covered islands, misty mountains, and glowing skies, allowing you to grasp key techniques while enjoying the creative process.
The vibe is more about capturing the essence than sweating the tiny stuff, so you can get the feel of a landscape—texture, color, light—without getting bogged down in perfection. It’s like, just let the paint flow and forget the grind, ya know? Art for the soul, not the ‘gram.
Here's What You'll Learn Inside The Class!
Module 1: Foundations
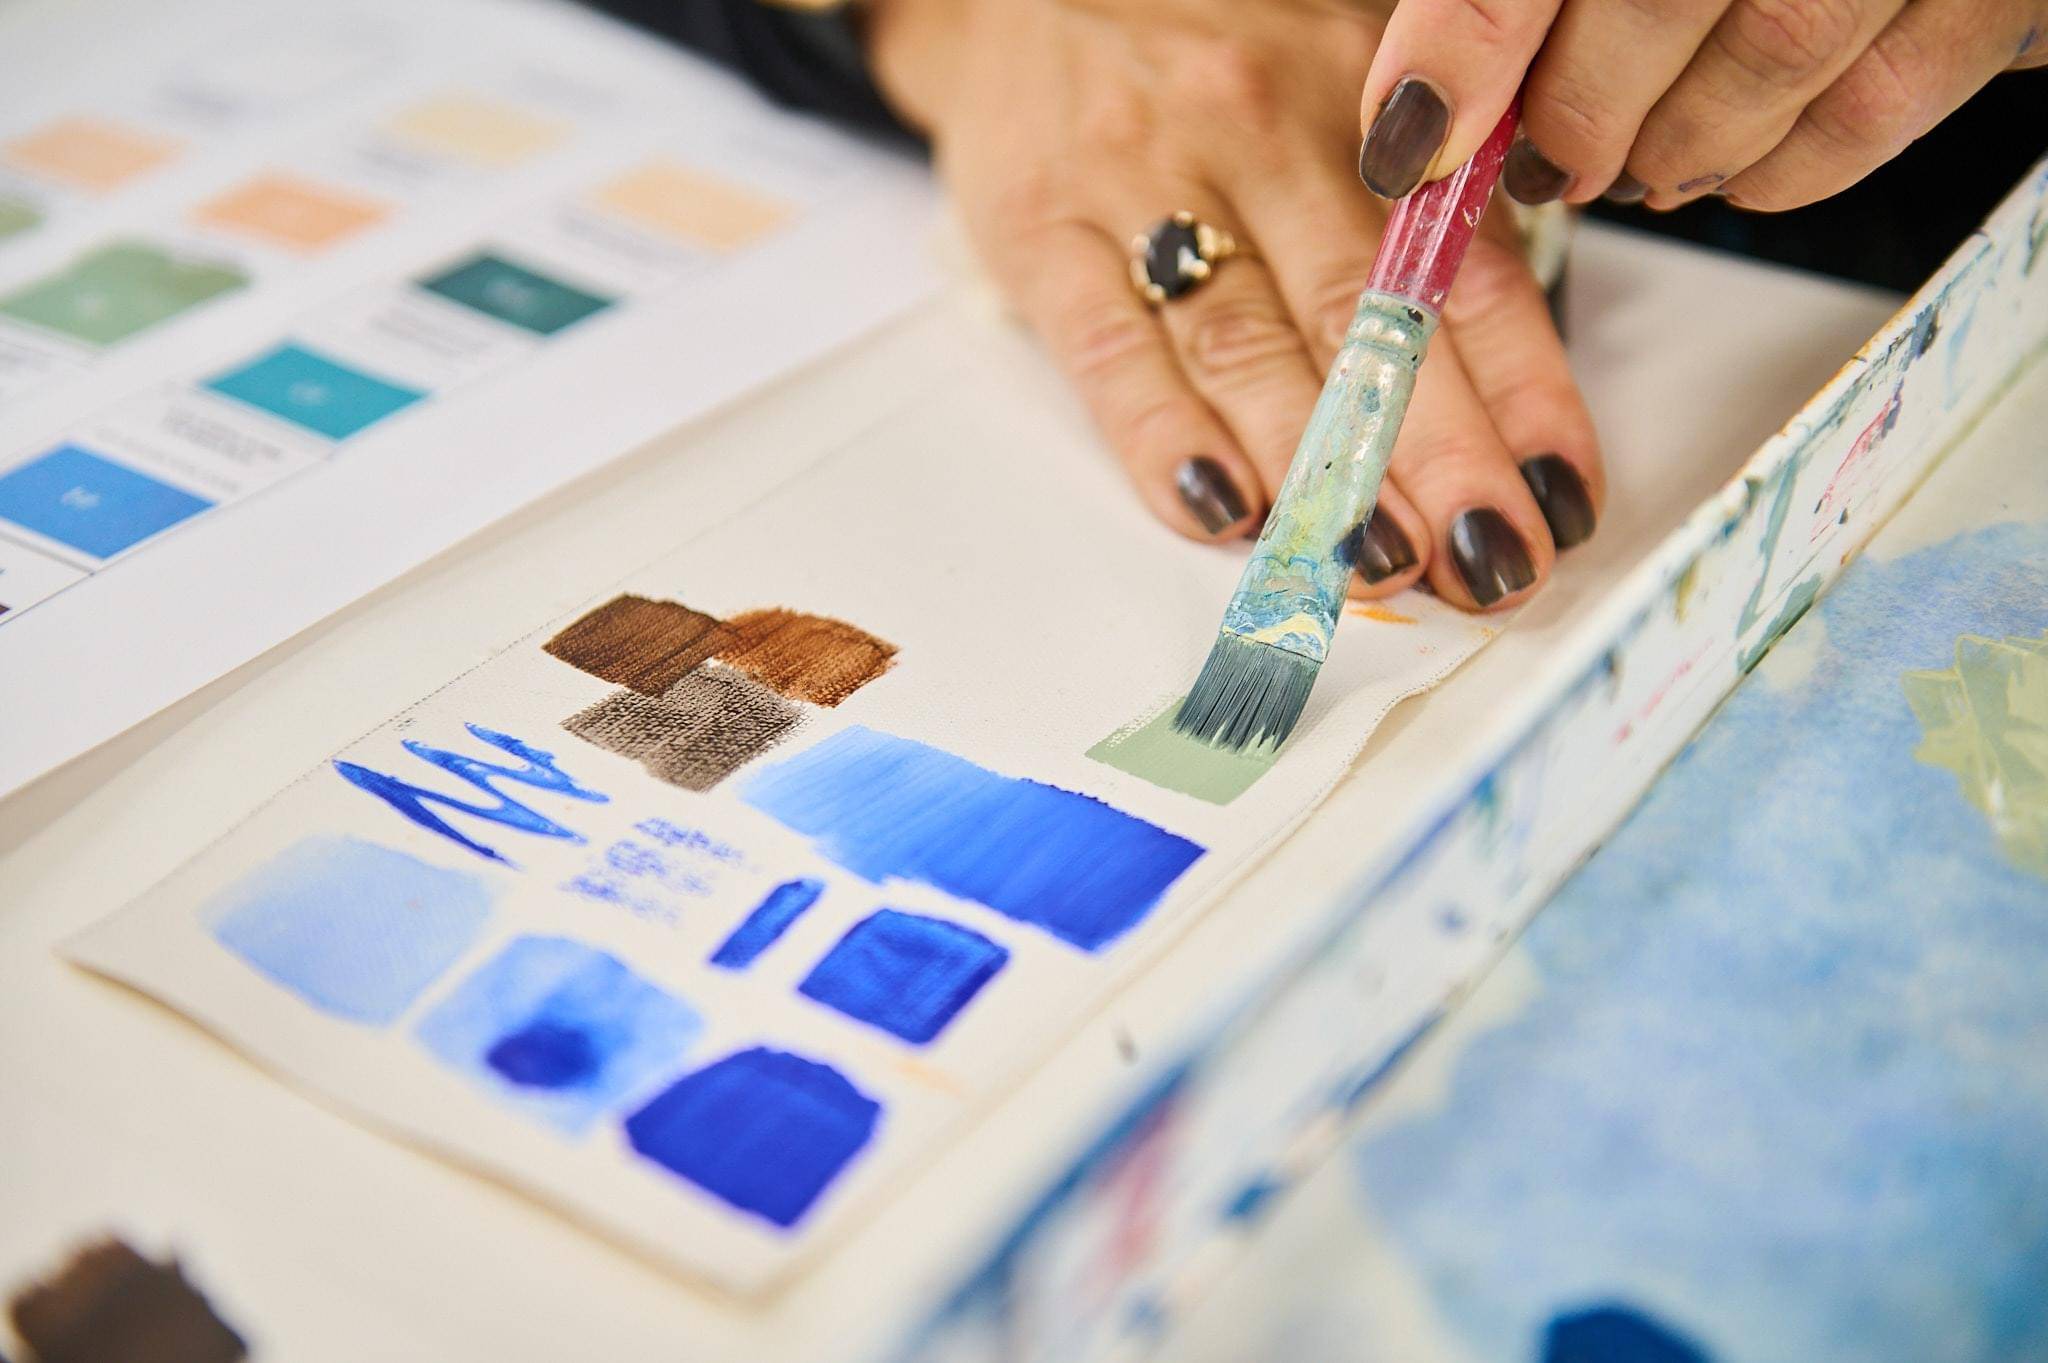
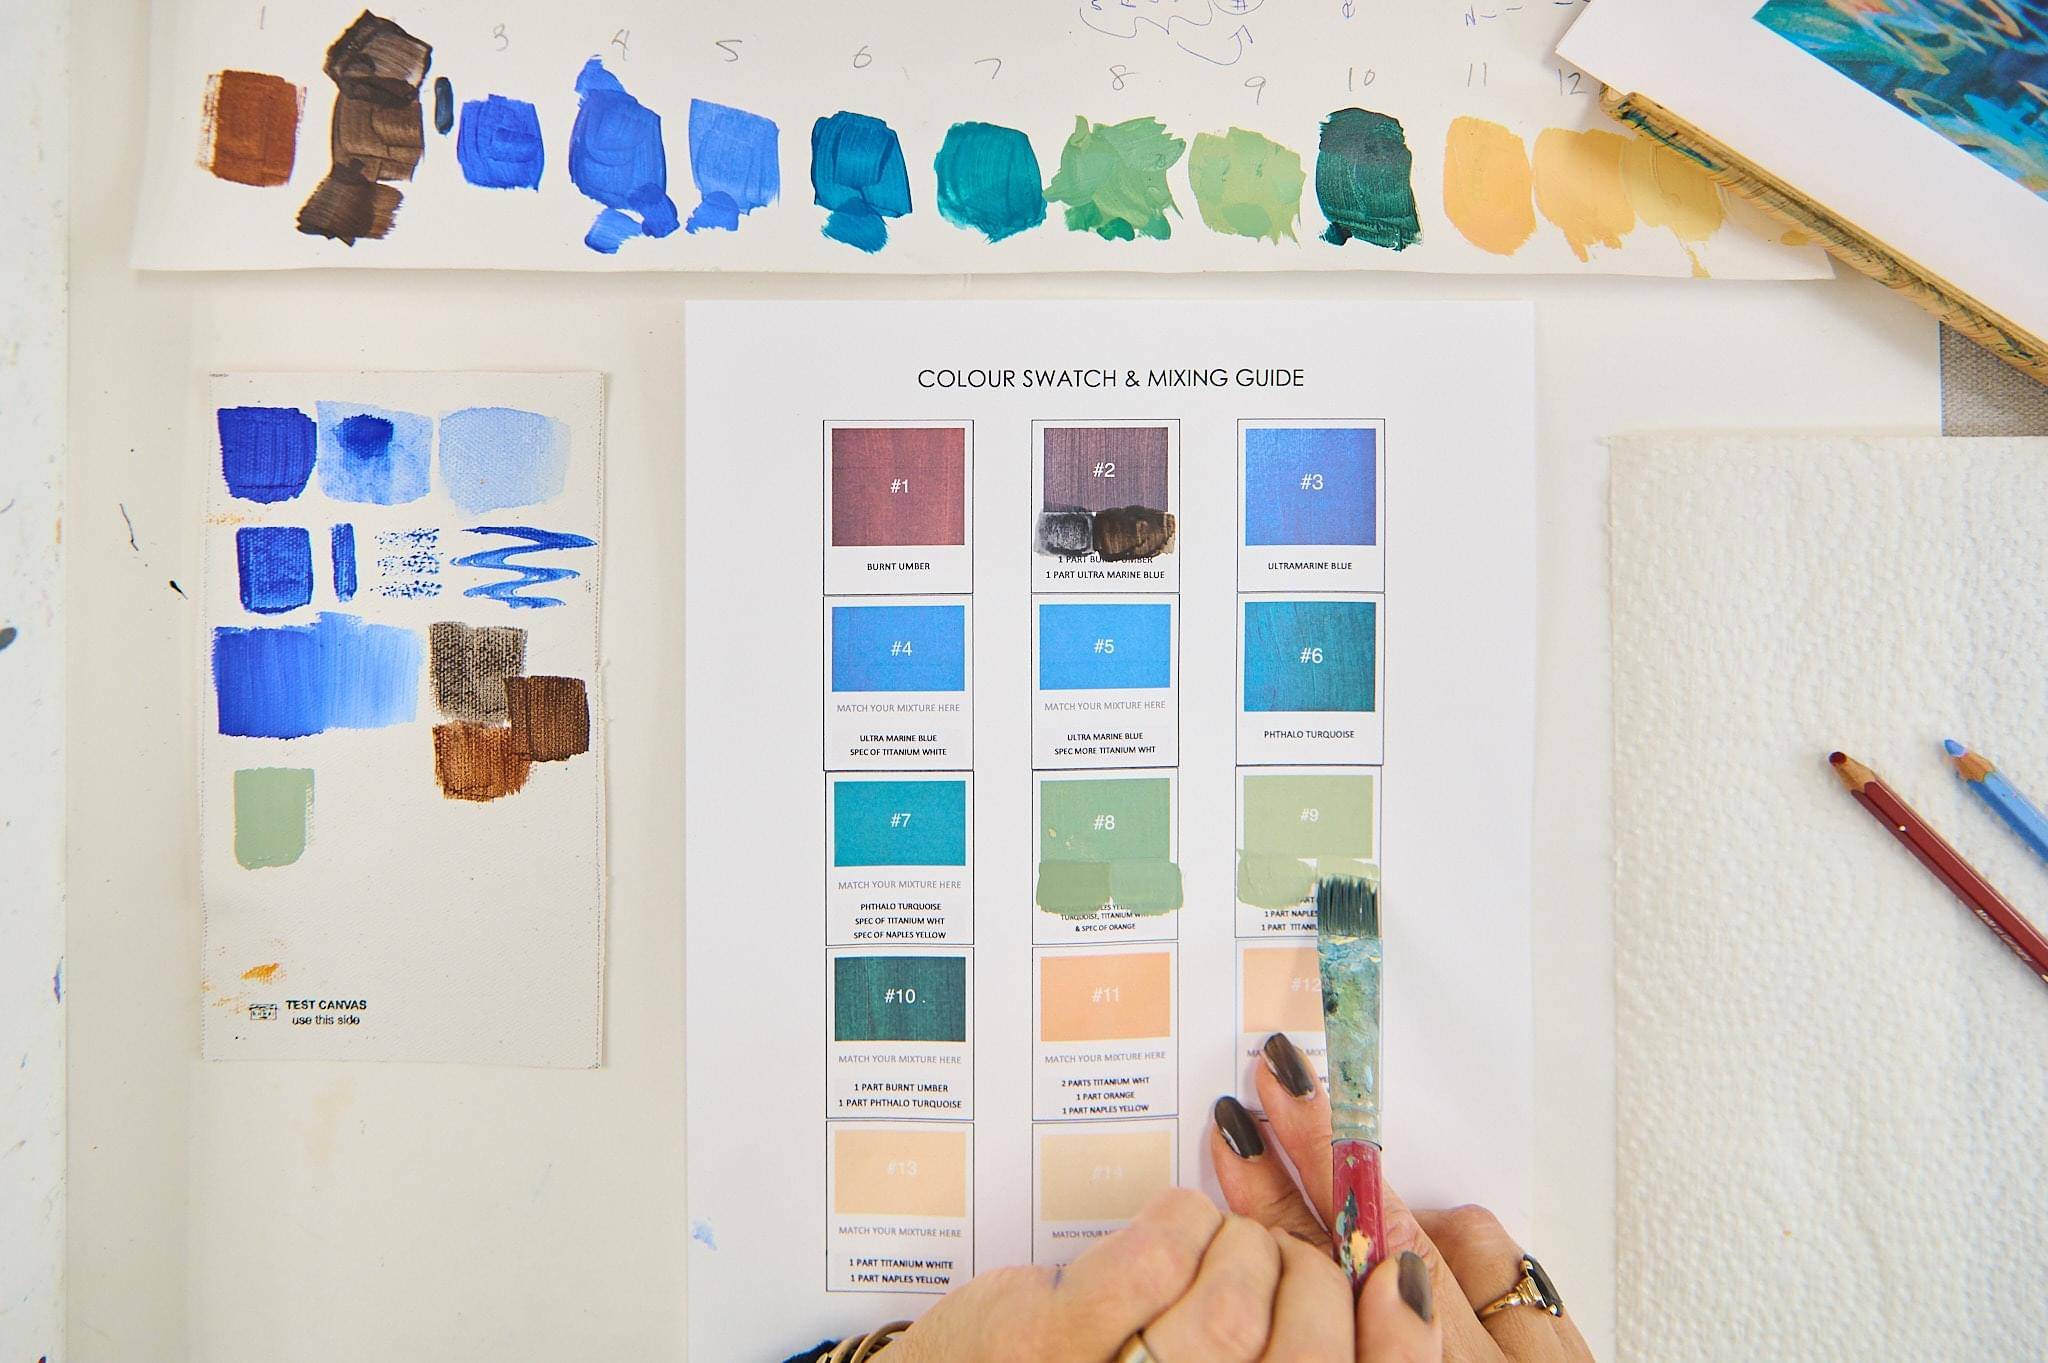
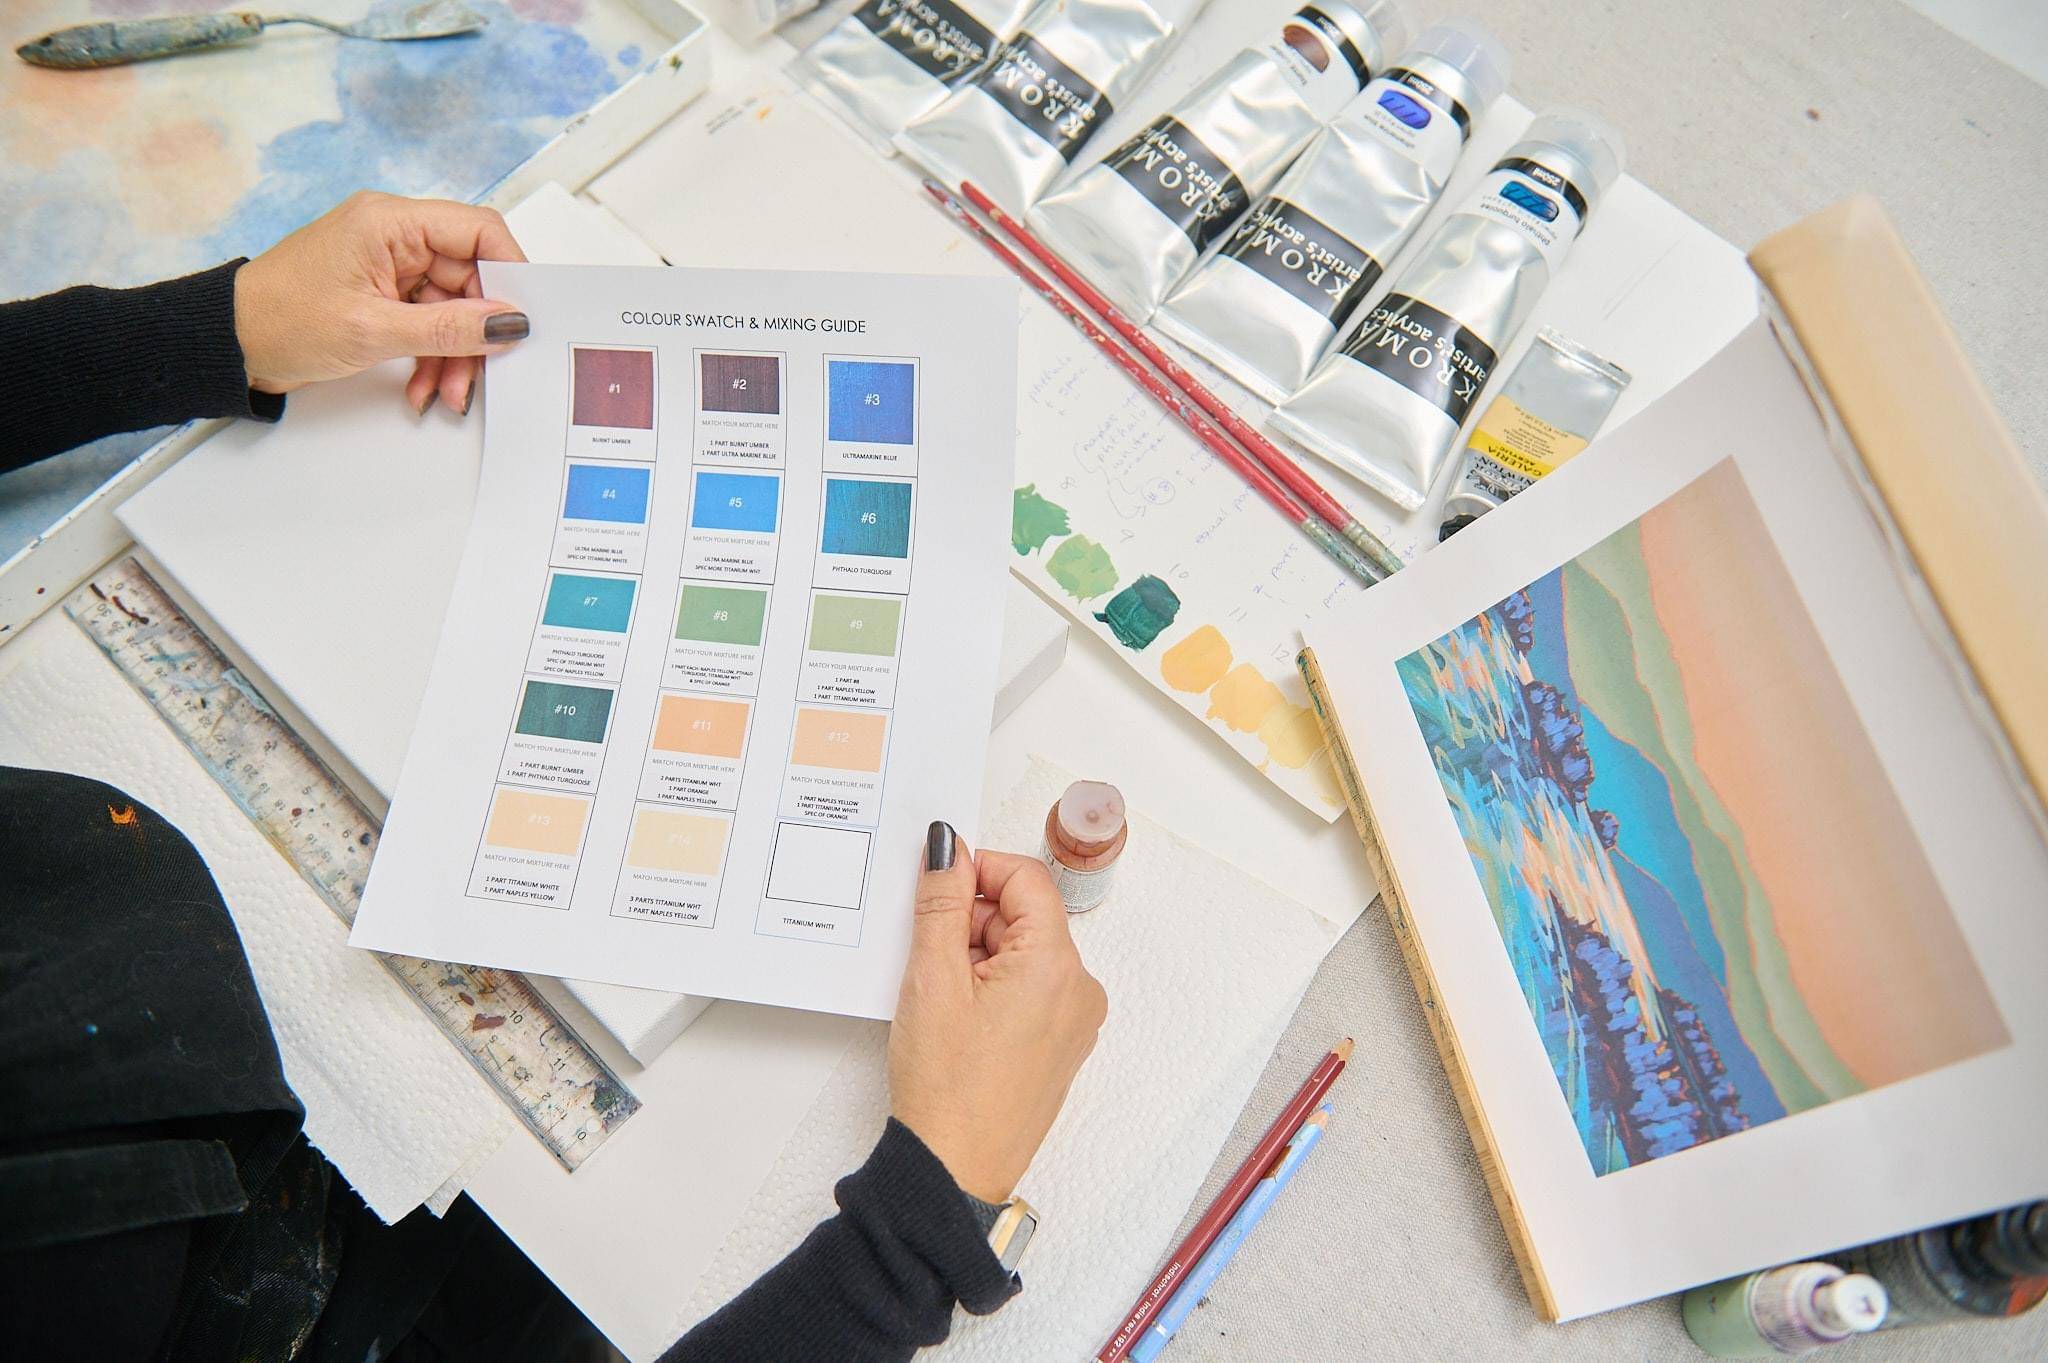
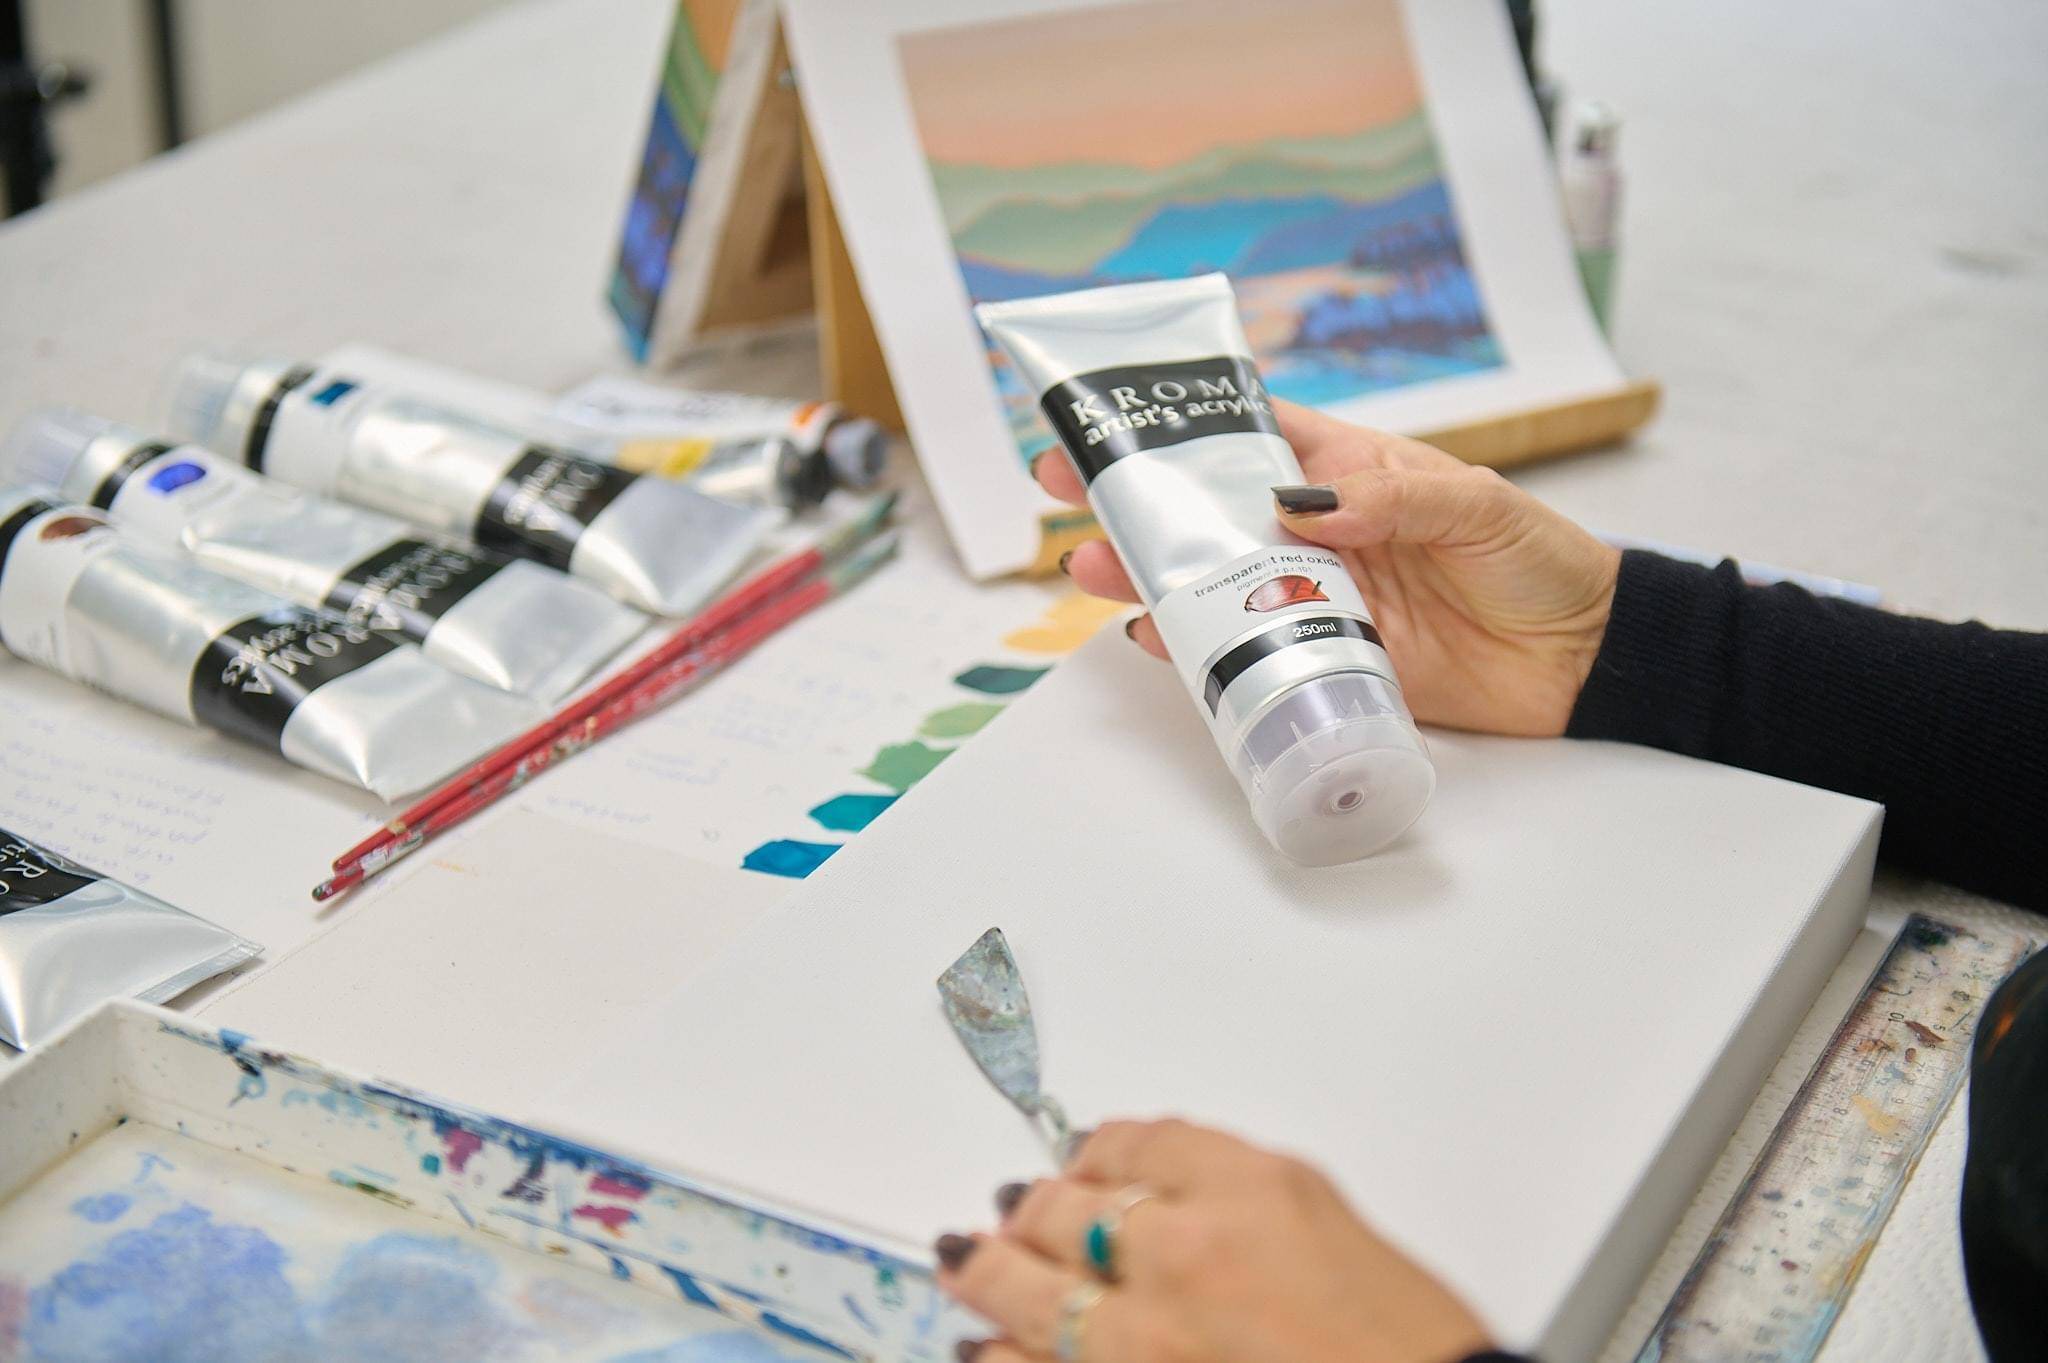
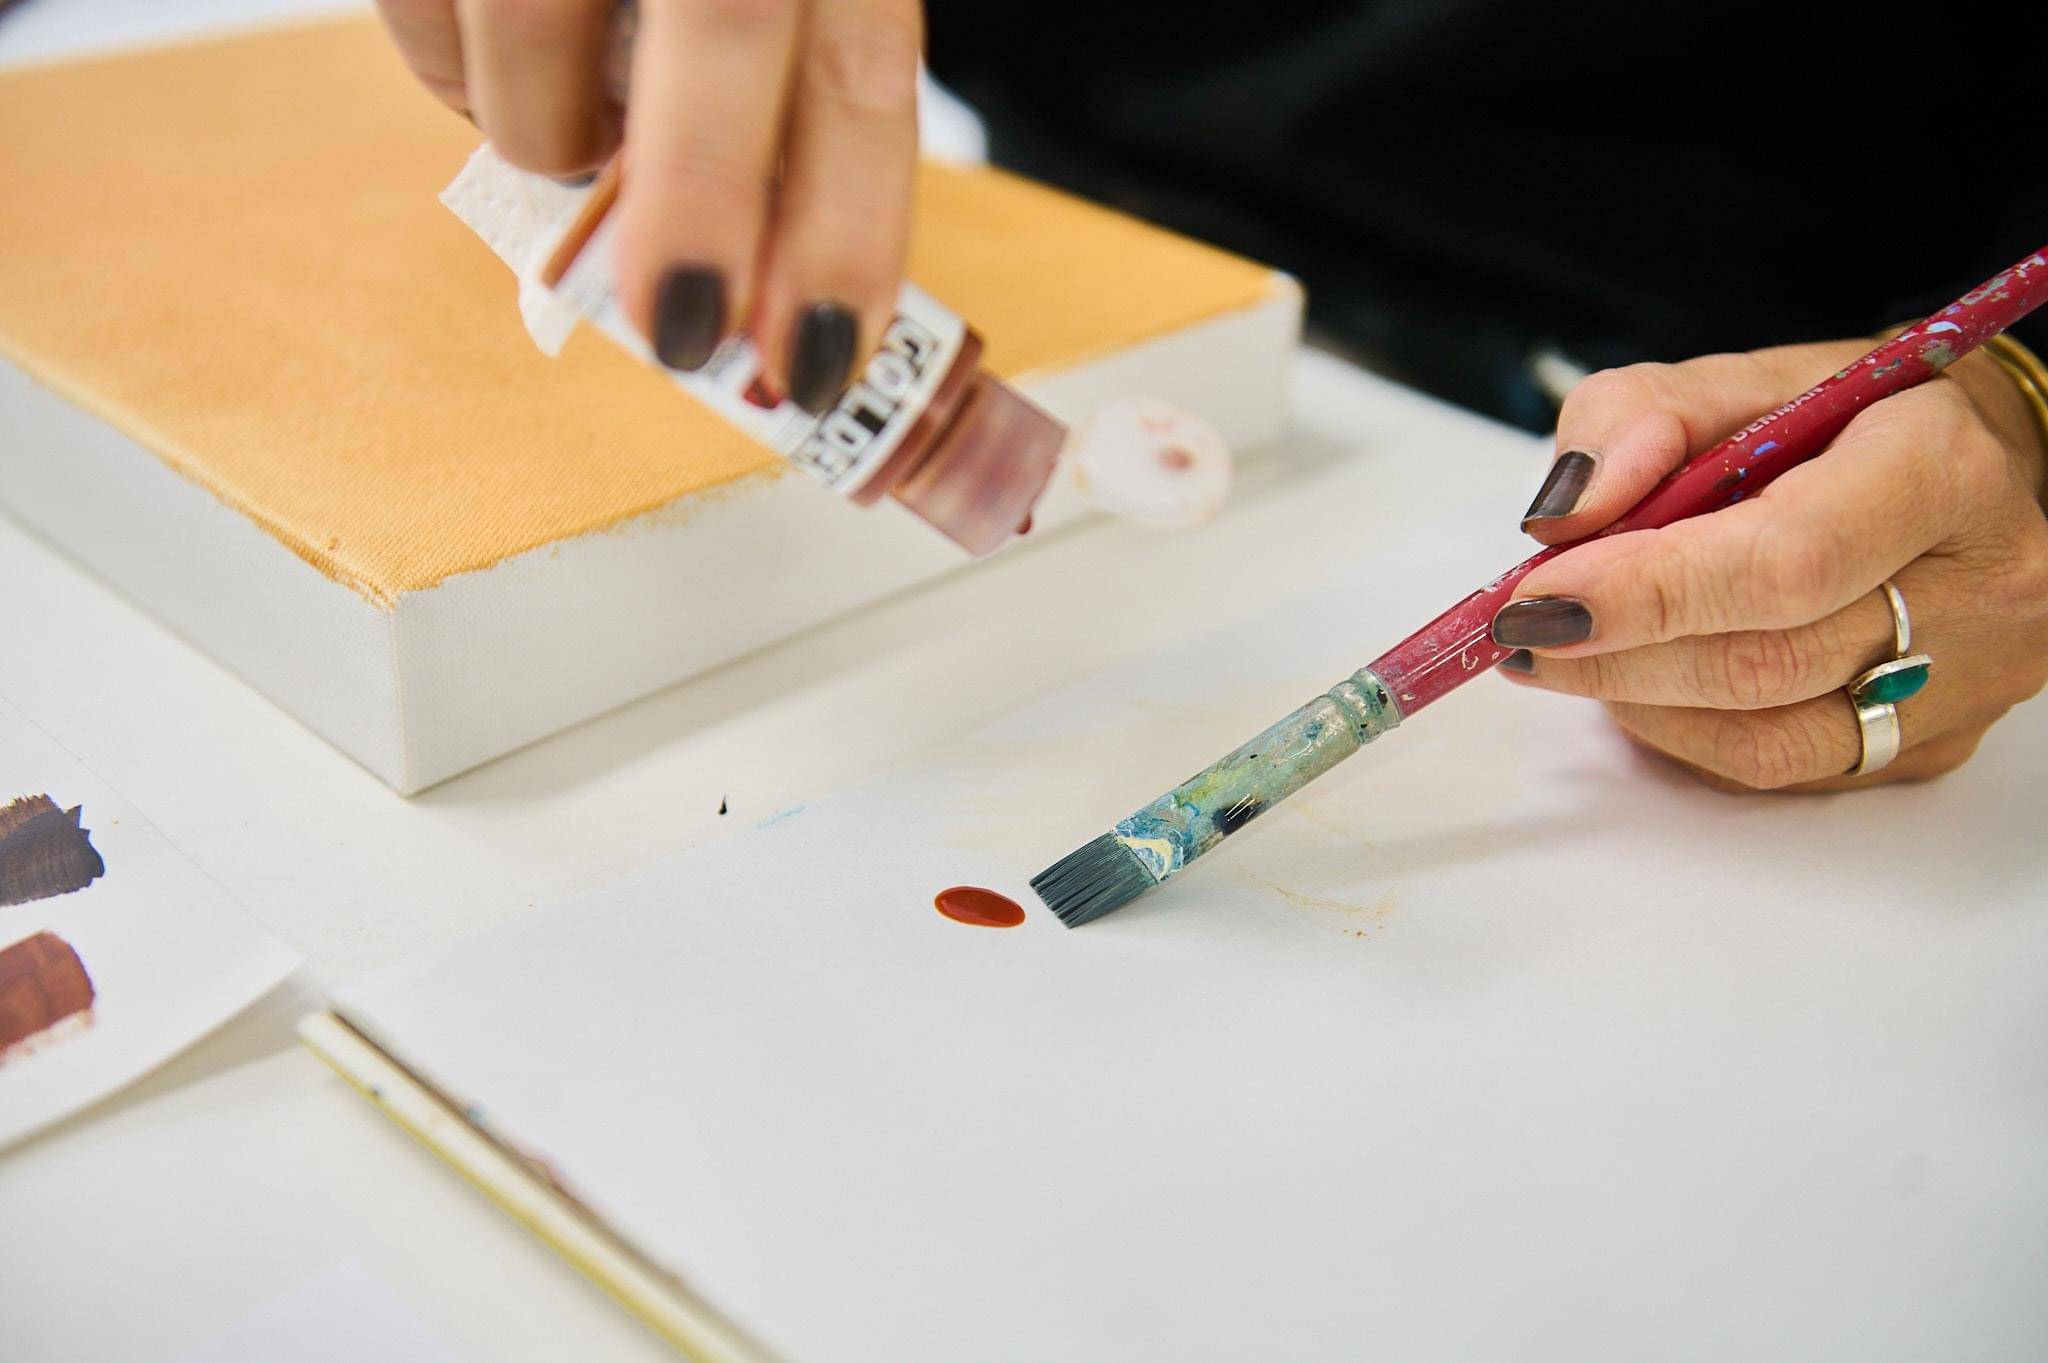
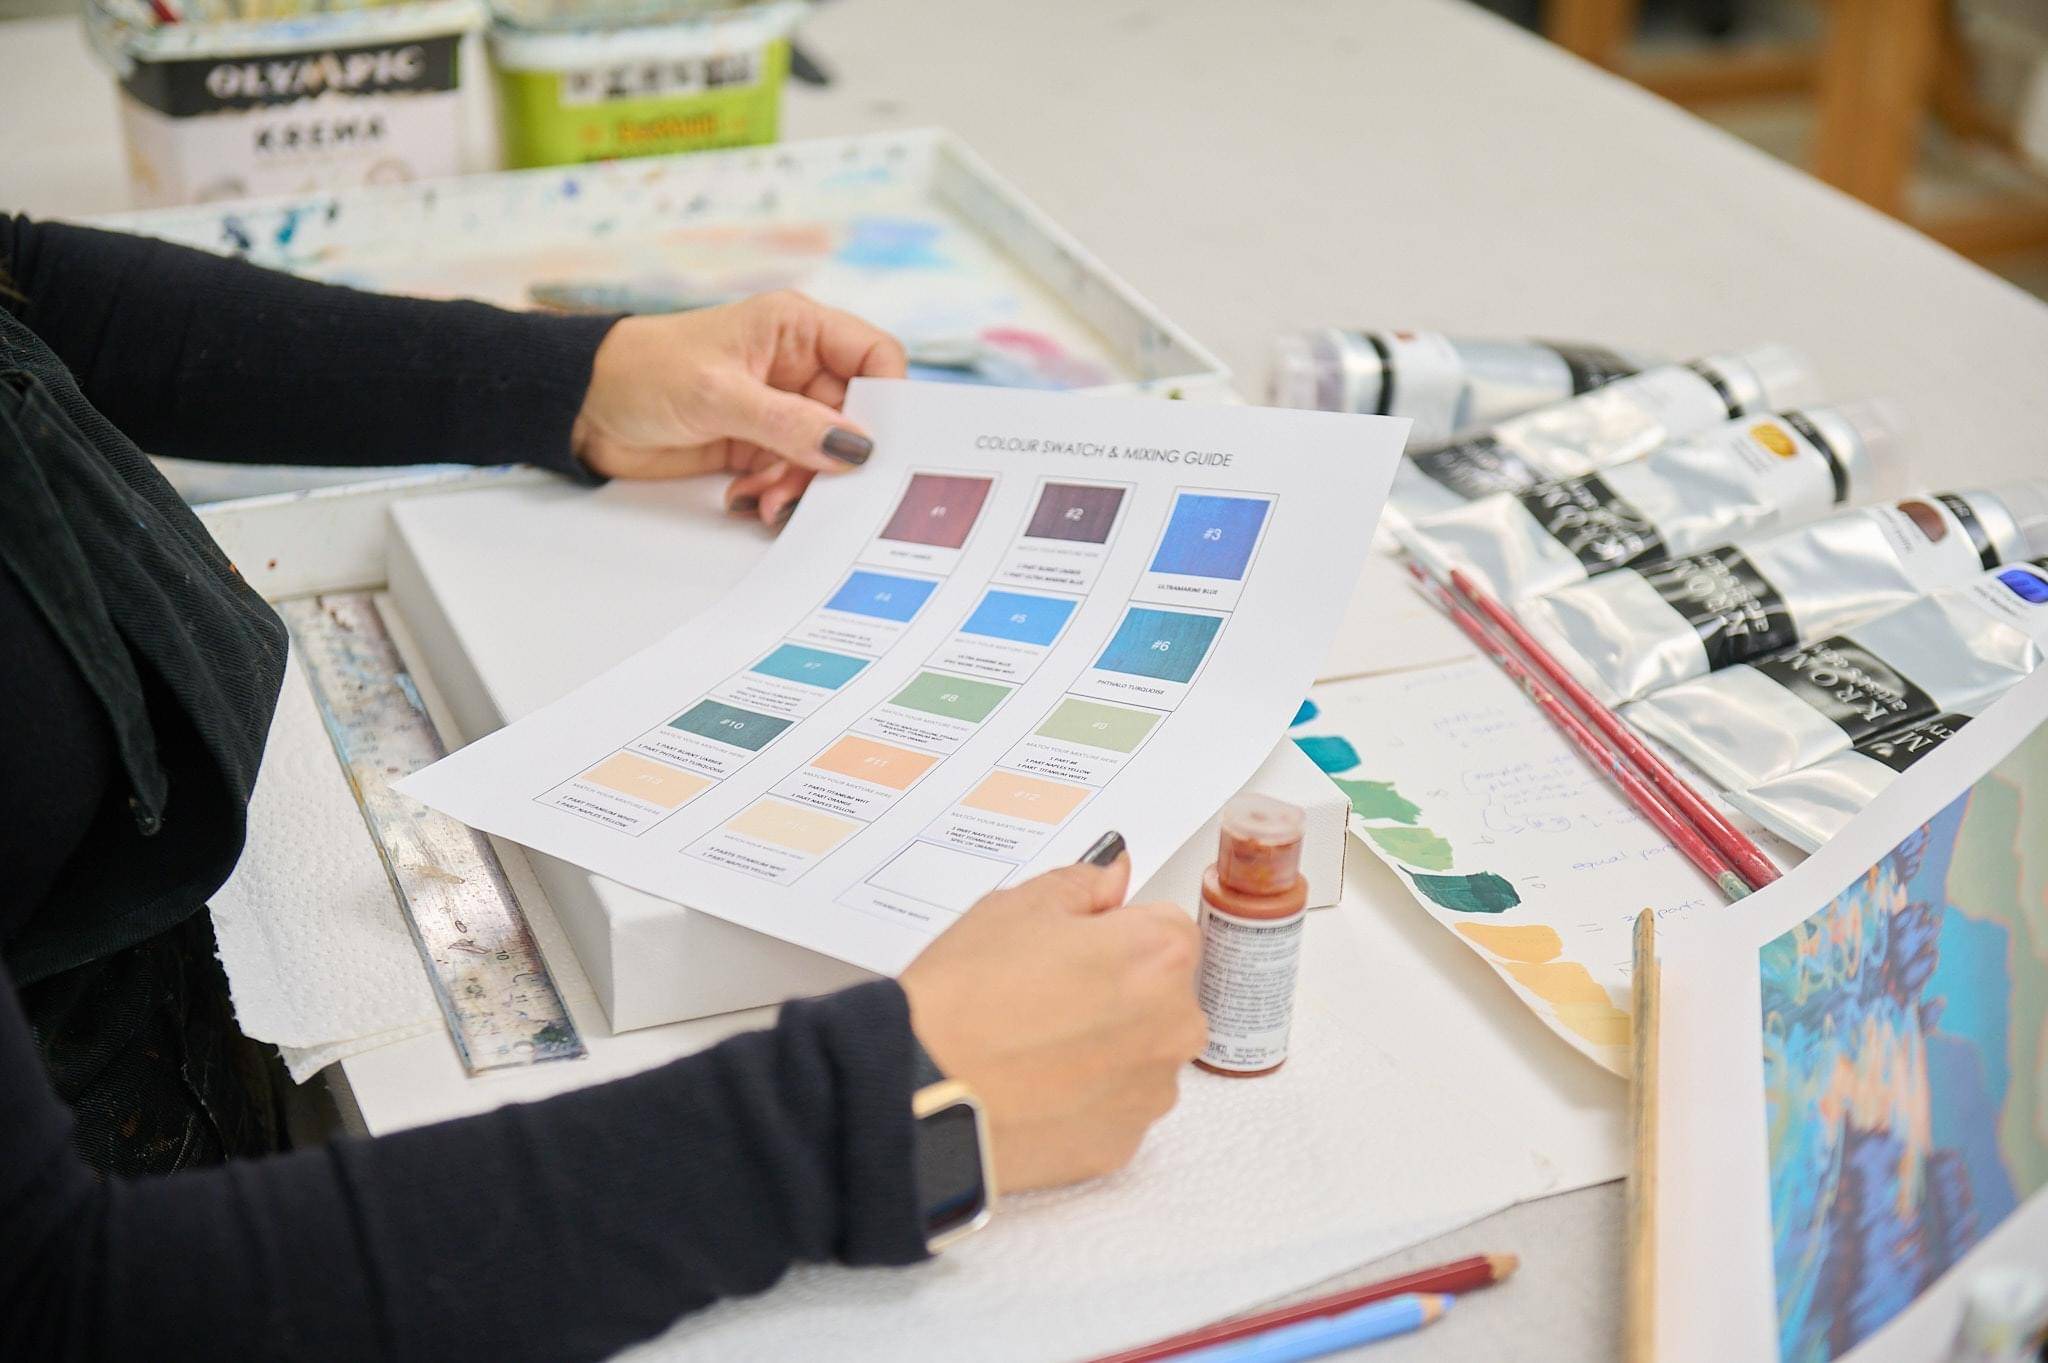
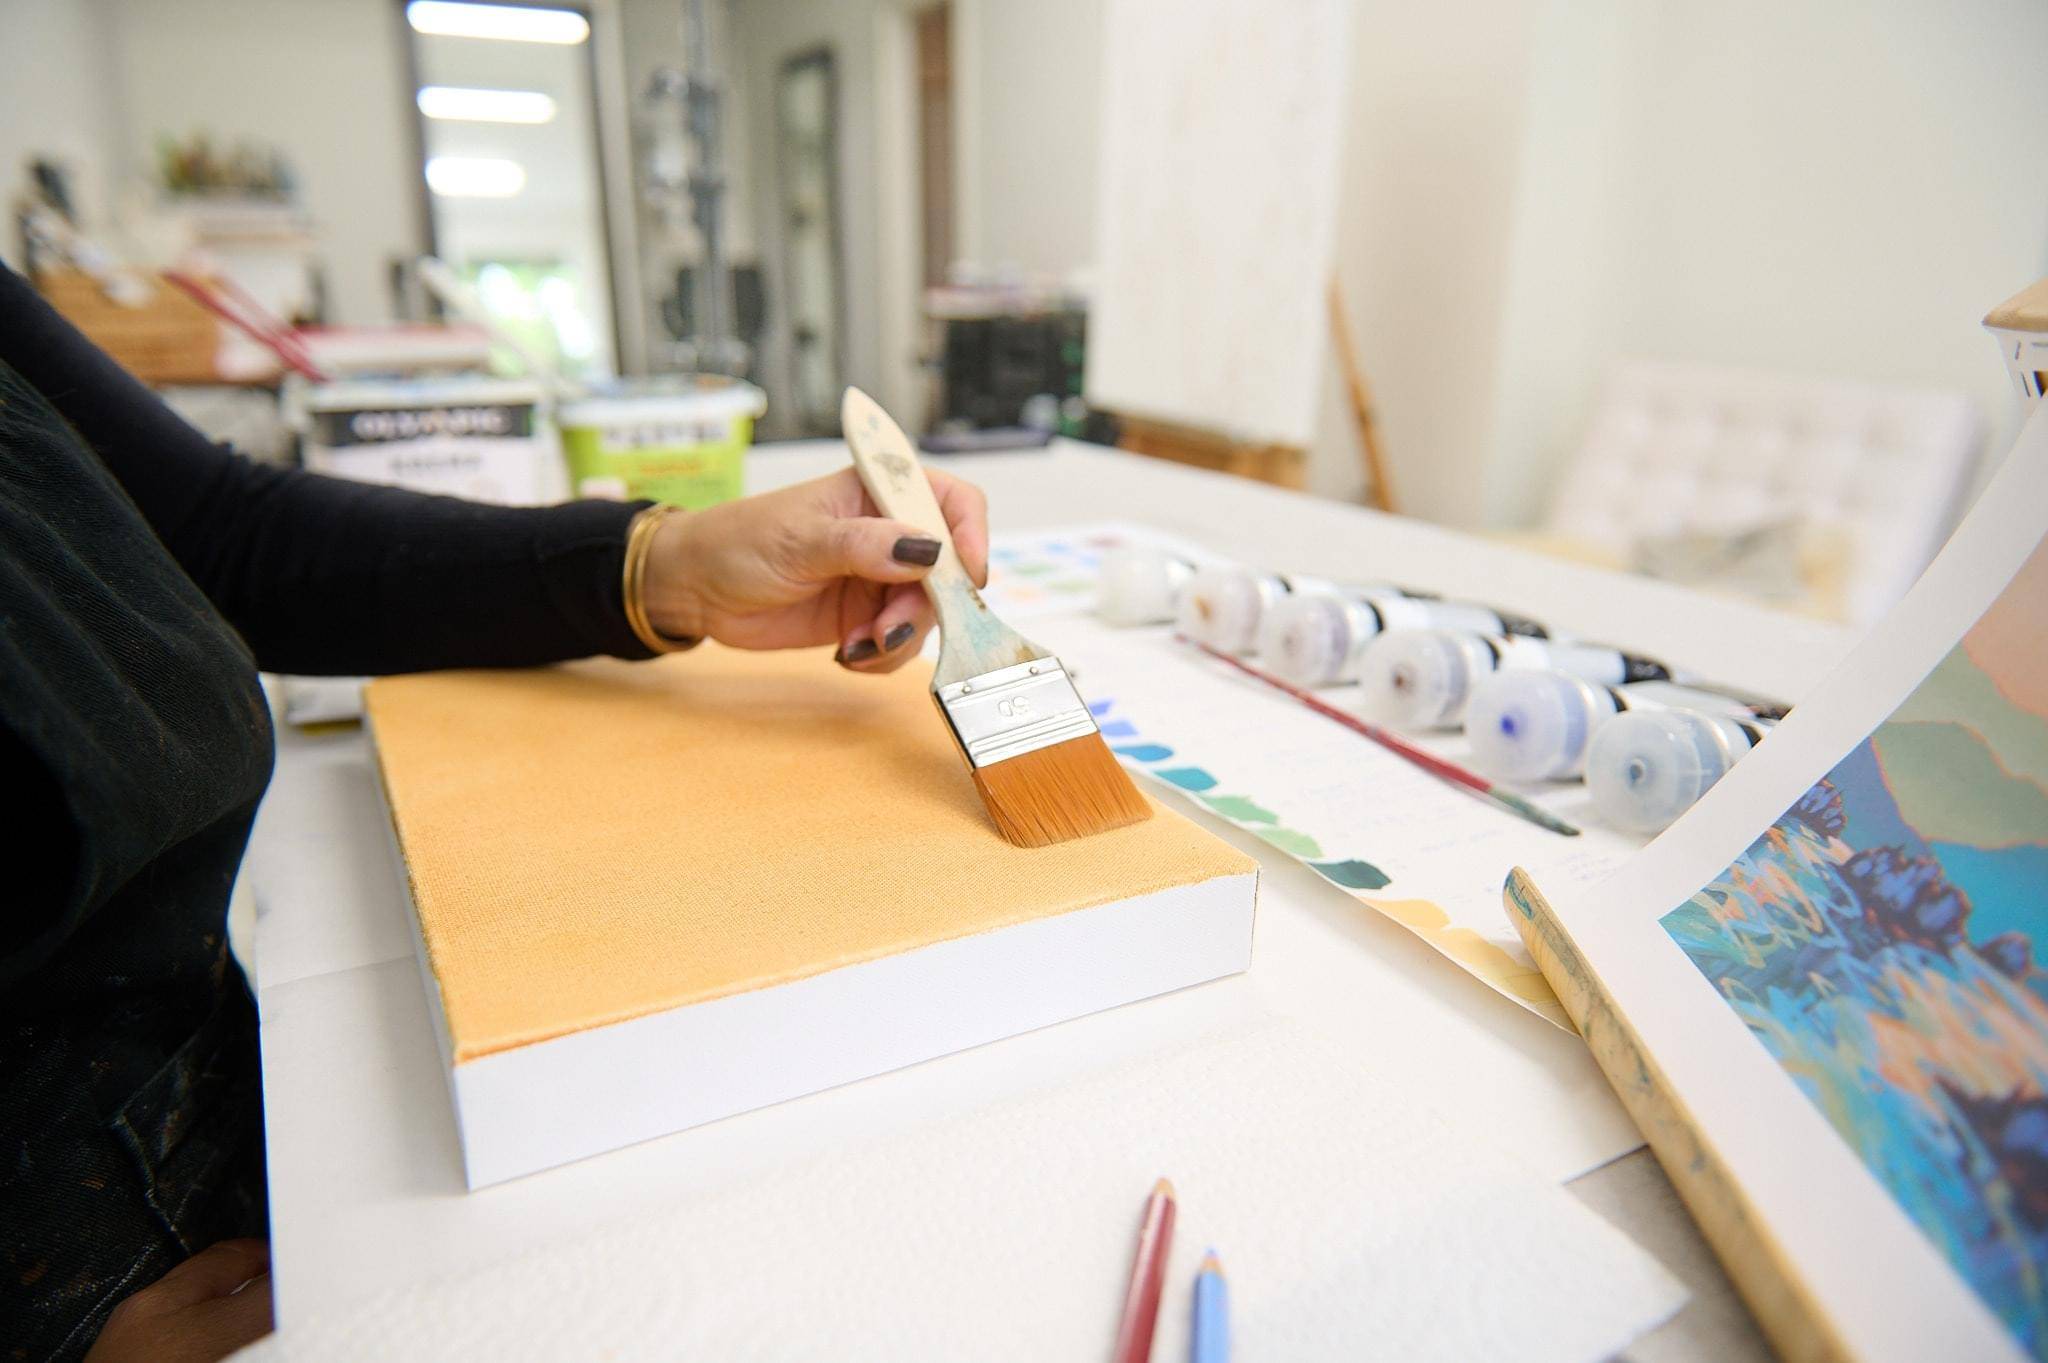
In this Module we will go over what supplies we need, how to set them up in our workspace, how to prep the canvas as well as some coloring mixing exercises. And lastly, we will sketch out our composition on our canvas
Module 2: Islands
In this module we will create our islands in three layers. We will begin by underpainting, which will create cohesion with the rest of the painting. Then we add a shadow layer, giving your islands depth. For our third layer, we will use three different values of blue, giving the trees on the island structure and highlights.
Module 3: Water Reflections Part 1
By using 6 different colors we’ll create depth for our water reflections in the shadow areas of the islands. We’ll use a darker selection of colors to achieve this. This will be just the first layer of the water, with more to come later.
Module 4: Mountain Range
This module will be the first of two layers of paint on the mountain range. Layering your paint increases the depth and luminosity of your final painting. You will learn how leaving a rim of your underpainting creates a back-lit glow on your mountain range.
Module 5: Water Reflection Part 2
By layering 4 more colours over our “island shadow” area we’ll create more depth and complexity for our water reflections.
Module 6: Mountain Mist
We’ll create a dreamy mist in the mountain range. I’ll teach you what wet-on-wet blending is. This will be a more challenging task if you are new to painting but don’t fret because you can repaint this over again once it dries and take a second approach. And as we’ve already learned, more layering creates more glow!
Module 7: Sky
We’ll create a blended glowing sunset sky. Using 4 different colors I’ll teach you what wet-on-wet blending is. This will be a more challenging task if you are new to painting but don’t fret because you can repaint this over again once it dries and take a second approach. And as we’ve already learned, more layering creates more glow!
Module 8: Water Reflections Part 3
By using 2 different colours we’ll create depth for our water reflections. We’ll use mid-value colours to represent the open area of the water. These two colours are chosen to represent the colour of water and the colour that would be a reflection of the mountain range.
Module 9: Water Reflections Part 4
By using 7 different colors we’ll create the highlights on the water. We’ll use light-value colors to represent the bright light from the sky hitting the water and also create a sense of movement. The colors are chosen to represent how the colors in the sky would reflect on the surface of the water. This final stage is magic because it really gives a 3-dimensional feel to the water.
Module 10: Final Assessment And Adjustments
You are the boss of your painting. You get to decide if you want to change or refine your design at this point. I believe it’s wise to step away from your painting for a bit, literally and figuratively. Take some time away from the process of painting, when you come back, you may have a fresh perspective of what you like or what you want to change. Physically stand far away from your work and view it from a distance. This helps you see the overall look of it instead of being caught up in the details. I find that taking a photo also helps give a different perspective. Or try squinting! Here are a few things to consider refining:
Here’s how this class will help you paint mountain scenes you’ll be proud of:
Master the Basics of Landscape Painting
From sketching outlines to blending gradients, you’ll learn tried-and-true techniques that bring depth and realism to your landscapes.
Gain Professional-Level Techniques
One of a kind tips that turn a blank canvas into a captivating mountain range. These are the same tricks pros use to add depth and dimension.
Build Unshakable Confidence
With simple, step-by-step lessons, painting won't feel intimidating anymore. By the end, you'll see how far you've come—and realize you CAN create something remarkable.
Ready To Discover Your Creativity?
This Class Includes
Step-by-Step Guidance: With this class, you’ll gain unlimited access to all 10 Modules, totaling four hours of painting instruction. So grab a paintbrush, and let’s create something you’ll be proud of.
Perfect Balance of Detail and Looseness: we will learn to create modern and minimalist mountainscapes utilizing value scales. We also learn about creating a sense of depth and atmosphere through various brushstroke techniques.
Focus on Fun and Creativity: This course isn’t just about learning techniques—it’s about enjoying the process. You’ll be encouraged to embrace imperfections, experiment with colour, and let your unique style shine through.
Engaging and Accessible: This class is designed for beginner painters, hobbyists, or anyone looking to increase their “brush mileage” with foundational skills in acrylic painting.
Enroll Today For Just: $47!
*All Prices Displayed Are In USD*
Frequently Asked Questions
Do I need prior painting experience?
Are the lessons LIVE or recorded?
The lessons are all pre-recorded so they are available to you at any time, on your own time. You can stop the videos, paint a bit, rewind and replay. That way you can learn at your own pace.
My paint dries too fast, I can’t keep up. Help!
This is one of the primary challenges for all artists that work with acrylic paint. You’re not alone! Whether your challenge is needing time to mix the right color or the time it takes to blend your paint on the canvas, the more you practice the faster you get. In the meantime, I cannot stress enough the importance of investing in a Masterson’s Sta-wet palette. This keeps your paint moist, allowing you more time to paint.
Do I need an easel?
If you have an easel and prefer to use one please do, but because the canvas we’re working on is small, you can simply paint on a table with the canvas laid flat. That is how I will demo the lessons.
My painting turned out darker than the reference image.
This is a common occurrence! Acrylic paint dries 30% darker after it dries. Try to be mindful of this while mixing your colors but be gentle on yourself, this skill will come in time with more practice.
No, all art is protected by copyright laws and may not be copied for the purpose of resale. Your painting is for learning purposes and for you to keep and treasure.
This is a common occurrence! Acrylic paint dries 30% darker after it dries. Try to be mindful of this while mixing your colors but be gentle on yourself, this skill will come in time with more practice.
How long does the course take to complete?
The course includes just over 2 hours of video lesson time. If you are an absolute beginner, the course will take you approximately 6 hours to complete. If you are an artist with some experience, it will take you approximately 4 hours to complete and 2-3 hours for practiced artists.
What brand of paint do you recommend?
My favorite brands are Golden and Kroma. (both heavy body acrylic) But you can use your favorite comparable brand. Just remember, the better the quality paint, the better results and the easier to work with. And if your brand doesn’t have the exact same colors, use the closest, knowing your result will vary.
Do I need to have a 12’x9” mounted canvas?
No, you can use a different size, slightly smaller or larger. I would only recommend a larger canvas if you are already a practiced artist though. Staying smaller will keep learning easier for beginners.You can also use a sheet of canvas, but fasten it to a sturdy surface with painters tape.
I don’t have the same brushes.
If you want to invest in the same brushes, great, if not, use something comparable. Two flat brights is what you’ll need. Note: every brand’s sizing is different. I recommend the Princeton Select Artiste Flat Shader, Series 3750, #6 and #10 but those numbers (6 & 10) may be a different size in a different brand.
Do I need my own reference photo?
I would recommend using the reference supplied if you are a beginner but if you have more experience, please use your own reference and use the lessons as a guide.
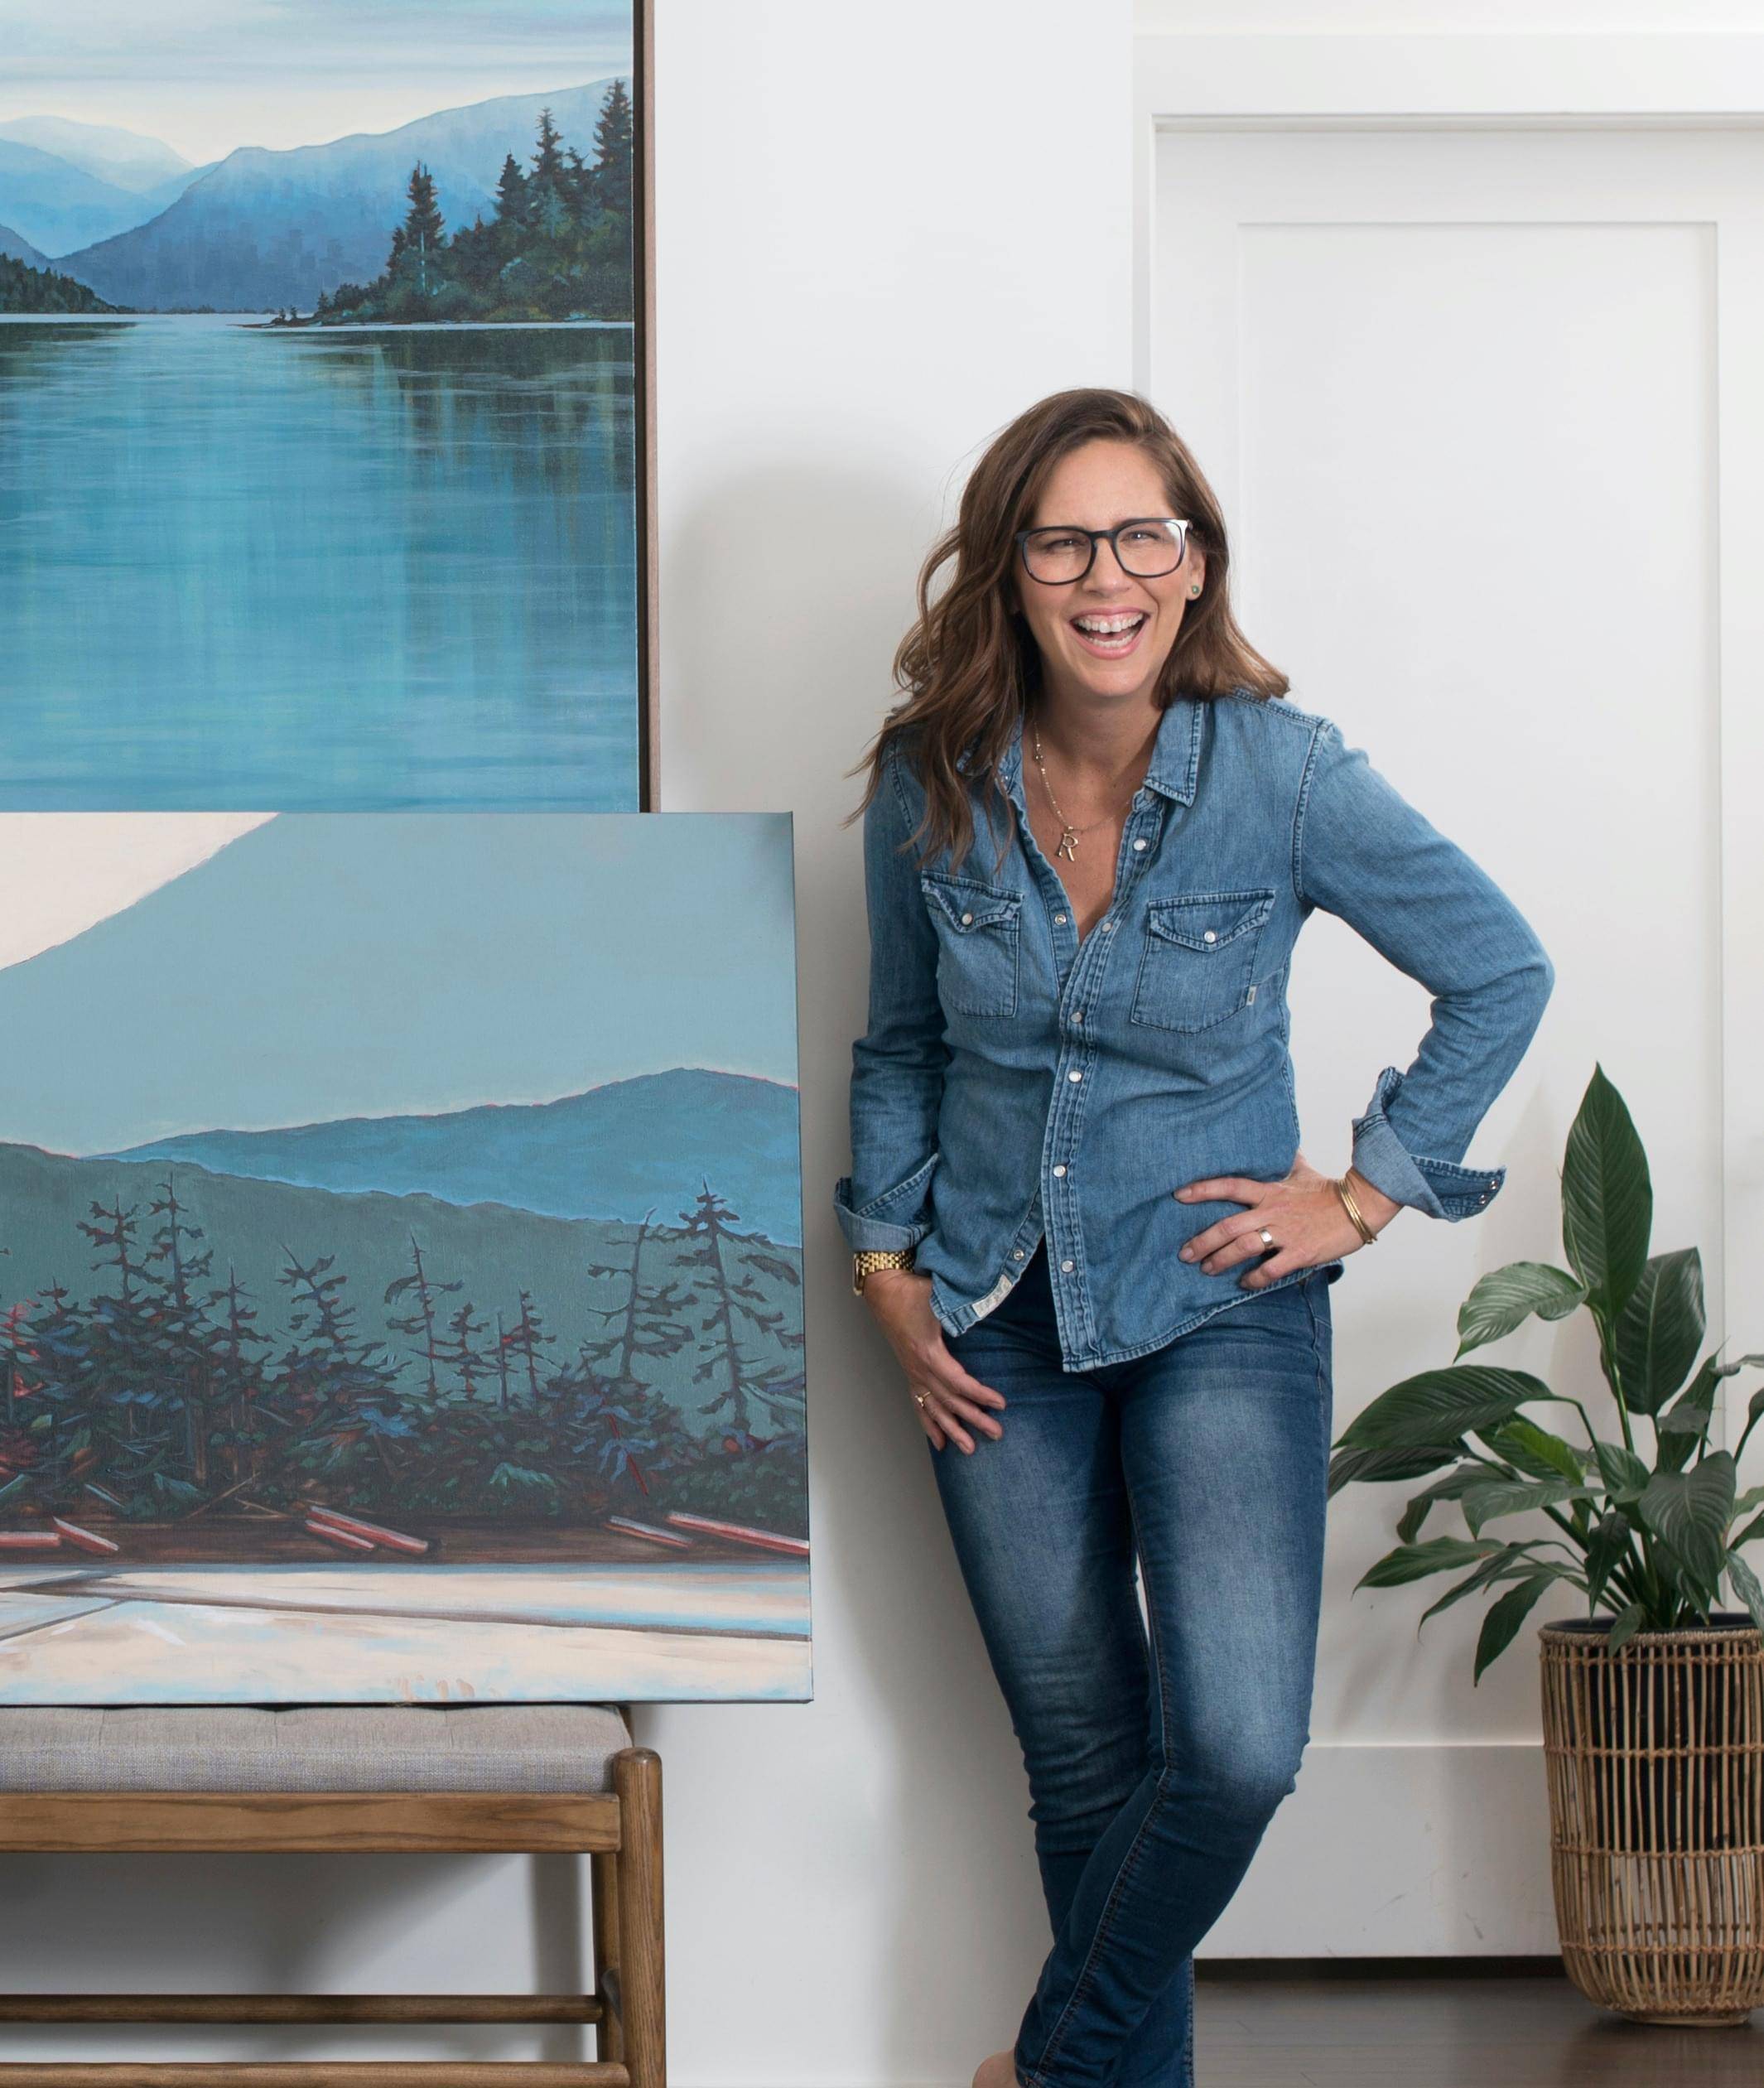
Meet Your Teacher
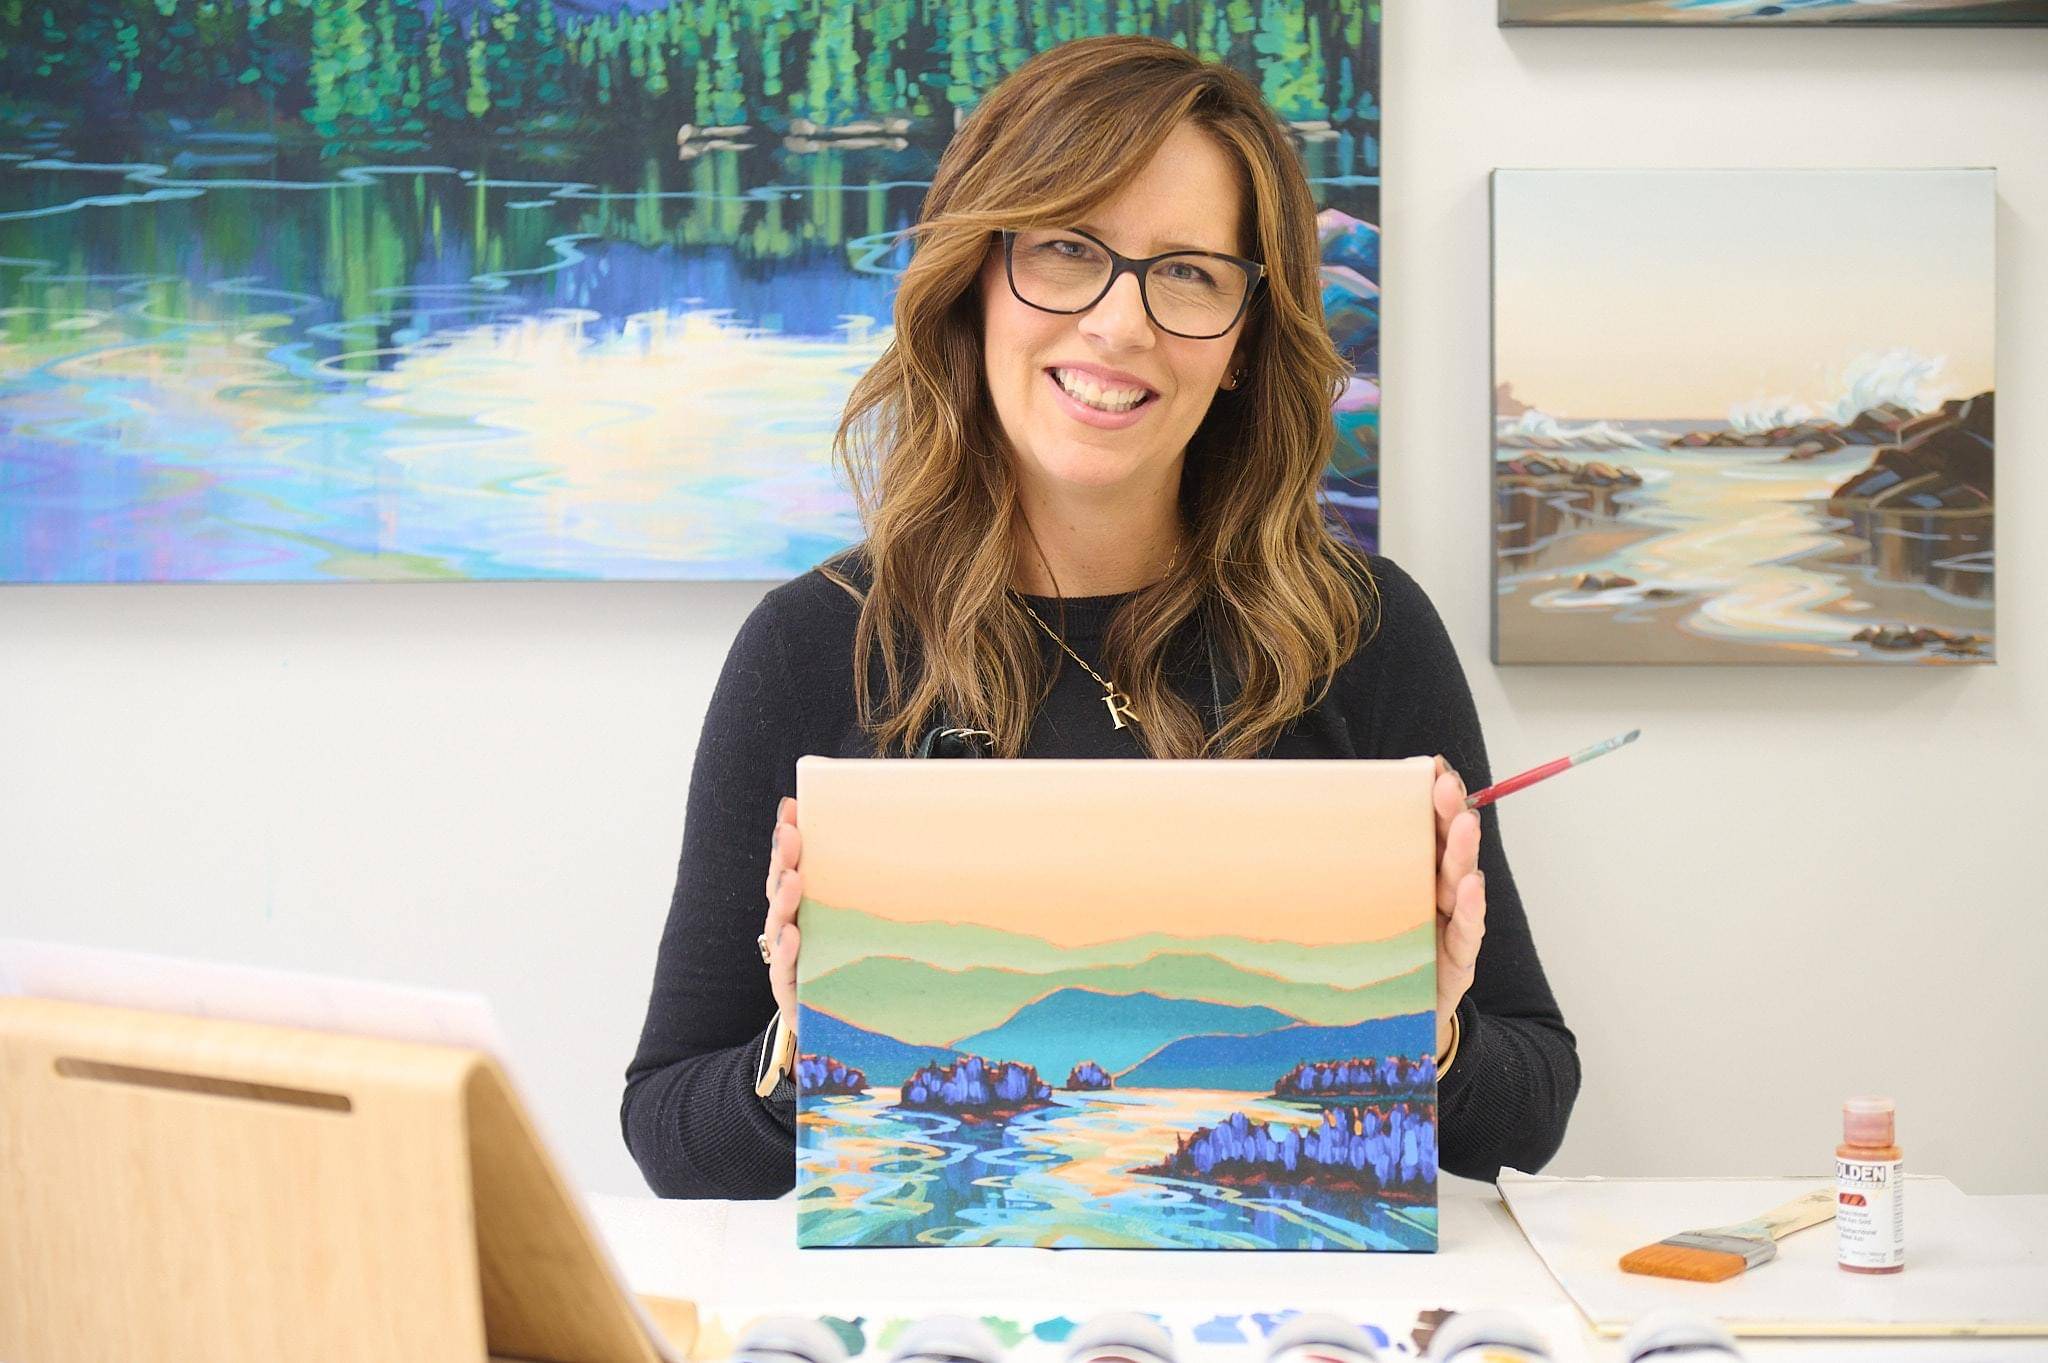
Hi, I’m Ronéi!
(Pronunciation: It’s Ron-A, not Ron-B. Lol.)
Learning to paint can feel overwhelming. I’ve been there. I was creative my whole life. Pencil drawing came easy to me but when it came to acrylic painting, I was completely overwhelmed. I knew what I wanted my painting to look like but couldn’t figure out how to make it happen. My paintings looked amateur and flat. Then my husband gave me a one-on-one course with a seasoned artist. The mystery of painting vanished in a few classes. She taught me the tips and tricks she had taken years to perfect. I want to be that teacher for you.
I promise you will have many “aha moments” as we work through the material. You’ll be saying things like, “Wow, so that’s how you do it! That’s easier than I thought.” And learning online means you can learn at your own pace, on your own schedule.
One of my favorite sayings is, “How do you eat an elephant? Answer…one bite at a time!” I’ll teach you step-by-step techniques that take the overwhelm out of painting. You’ll learn to create beautiful layered landscape paintings that have depth and GLOW.
So, let’s take the mystery of painting away, come paint with me!
by Ronei Fagenello
Craft your own signature West Coast landscapes, including misty mountains, glowing sunsets, and rippling ocean reflections - in 10 easy steps!
Effortlessly Paint Landscapes With Skies that "GLOW"
This simplified & FUN method will help you produce beautiful landscapes without the headache of figuring it all out alone - especially if you've never painted before!
Normally $67
🌷Spring Sale: $47
*All Prices Displayed Are In USD*
Your 10 step guide to creating an acrylic coastal painting that glows.
This painting class features iconic elements of the West Coast!
Such as tree-covered islands, misty mountains, and glowing skies, allowing you to grasp key techniques while enjoying the creative process.
The vibe is more about capturing the essence than sweating the tiny stuff, so you can get the feel of a landscape—texture, color, light—without getting bogged down in perfection. It’s like, just let the paint flow and forget the grind, ya know? Art for the soul, not the ‘gram.
Here's What You'll Learn Inside The Class!
Module 1: Foundations
In this Module we will go over what supplies we need, how to set them up in our workspace, how to prep the canvas as well as some coloring mixing exercises. And lastly, we will sketch out our composition on our canvas
Module 2: Islands
In this module we will create our islands in three layers. We will begin by underpainting, which will create cohesion with the rest of the painting. Then we add a shadow layer, giving your islands depth. For our third layer, we will use three different values of blue, giving the trees on the island structure and highlights.
Module 3: Water Reflections Part 1
By using 6 different colors we’ll create depth for our water reflections in the shadow areas of the islands. We’ll use a darker selection of colors to achieve this. This will be just the first layer of the water, with more to come later.
Module 4: Mountain Range
This module will be the first of two layers of paint on the mountain range. Layering your paint increases the depth and luminosity of your final painting. You will learn how leaving a rim of your underpainting creates a back-lit glow on your mountain range.
Module 5: Water Reflection Part 2
By layering 4 more colours over our “island shadow” area we’ll create more depth and complexity for our water reflections.
Module 6: Mountain Mist
We’ll create a dreamy mist in the mountain range. I’ll teach you what wet-on-wet blending is. This will be a more challenging task if you are new to painting but don’t fret because you can repaint this over again once it dries and take a second approach. And as we’ve already learned, more layering creates more glow!
Module 7: Sky
We’ll create a blended glowing sunset sky. Using 4 different colors I’ll teach you what wet-on-wet blending is. This will be a more challenging task if you are new to painting but don’t fret because you can repaint this over again once it dries and take a second approach. And as we’ve already learned, more layering creates more glow!
Module 8: Water Reflections Part 3
By using 2 different colours we’ll create depth for our water reflections. We’ll use mid-value colours to represent the open area of the water. These two colours are chosen to represent the colour of water and the colour that would be a reflection of the mountain range.
Module 9: Water Reflections Part 4
By using 7 different colors we’ll create the highlights on the water. We’ll use light-value colors to represent the bright light from the sky hitting the water and also create a sense of movement. The colors are chosen to represent how the colors in the sky would reflect on the surface of the water. This final stage is magic because it really gives a 3-dimensional feel to the water.
Module 10: Final Assessment And Adjustments
You are the boss of your painting. You get to decide if you want to change or refine your design at this point. I believe it’s wise to step away from your painting for a bit, literally and figuratively. Take some time away from the process of painting, when you come back, you may have a fresh perspective of what you like or what you want to change. Physically stand far away from your work and view it from a distance. This helps you see the overall look of it instead of being caught up in the details. I find that taking a photo also helps give a different perspective. Or try squinting! Here are a few things to consider refining:
Here’s how this class will help you paint mountain scenes you’ll be proud of:
Master the Basics of Landscape Painting
From sketching outlines to blending gradients, you’ll learn tried-and-true techniques that bring depth and realism to your landscapes.
Gain Professional-Level Techniques
One of a kind tips that turn a blank canvas into a captivating mountain range. These are the same tricks pros use to add depth and dimension.
Build Unshakable Confidence
With simple, step-by-step lessons, painting won't feel intimidating anymore. By the end, you'll see how far you've come—and realize you CAN create something remarkable.
Ready To Discover Your Creativity?
This Class Includes
Step-by-Step Guidance: With this class, you’ll gain unlimited access to all 10 Modules, totaling four hours of painting instruction. So grab a paintbrush, and let’s create something you’ll be proud of.
Perfect Balance of Detail and Looseness: we will learn to create modern and minimalist mountainscapes utilizing value scales. We also learn about creating a sense of depth and atmosphere through various brushstroke techniques.
Focus on Fun and Creativity: This course isn’t just about learning techniques—it’s about enjoying the process. You’ll be encouraged to embrace imperfections, experiment with colour, and let your unique style shine through.
Engaging and Accessible: This class is designed for beginner painters, hobbyists, or anyone looking to increase their “brush mileage” with foundational skills in acrylic painting.
Enroll Today For Just: $47!
*All Prices Displayed Are In USD*
Frequently Asked Questions
Do I need prior painting experience?
Not at all! I will walk you through everything you need, step by step. Prior experience will however, aid you in moving through the course modules more quickly.
Are the lessons LIVE or recorded?
The lessons are all pre-recorded so they are available to you at any time, on your own time. You can stop the videos, paint a bit, rewind and replay. That way you can learn at your own pace.
My paint dries too fast, I can’t keep up. Help!
This is one of the primary challenges for all artists that work with acrylic paint. You’re not alone! Whether your challenge is needing time to mix the right color or the time it takes to blend your paint on the canvas, the more you practice the faster you get. In the meantime, I cannot stress enough the importance of investing in a Masterson’s Sta-wet palette. This keeps your paint moist, allowing you more time to paint.
Do I need an easel?
If you have an easel and prefer to use one please do, but because the canvas we’re working on is small, you can simply paint on a table with the canvas laid flat. That is how I will demo the lessons.
My painting turned out darker than the reference image.
This is a common occurrence! Acrylic paint dries 30% darker after it dries. Try to be mindful of this while mixing your colors but be gentle on yourself, this skill will come in time with more practice.
No, all art is protected by copyright laws and may not be copied for the purpose of resale. Your painting is for learning purposes and for you to keep and treasure.
This is a common occurrence! Acrylic paint dries 30% darker after it dries. Try to be mindful of this while mixing your colors but be gentle on yourself, this skill will come in time with more practice.
How long does the course take to complete?
The course includes just over 2 hours of video lesson time. If you are an absolute beginner, the course will take you approximately 6 hours to complete. If you are an artist with some experience, it will take you approximately 4 hours to complete and 2-3 hours for practiced artists.
What brand of paint do you recommend?
My favorite brands are Golden and Kroma. (both heavy body acrylic) But you can use your favorite comparable brand. Just remember, the better the quality paint, the better results and the easier to work with. And if your brand doesn’t have the exact same colors, use the closest, knowing your result will vary.
Do I need to have a 12’x9” mounted canvas?
No, you can use a different size, slightly smaller or larger. I would only recommend a larger canvas if you are already a practiced artist though. Staying smaller will keep learning easier for beginners.You can also use a sheet of canvas, but fasten it to a sturdy surface with painters tape.
I don’t have the same brushes.
If you want to invest in the same brushes, great, if not, use something comparable. Two flat brights is what you’ll need. Note: every brand’s sizing is different. I recommend the Princeton Select Artiste Flat Shader, Series 3750, #6 and #10 but those numbers (6 & 10) may be a different size in a different brand.
Do I need my own reference photo?
I would recommend using the reference supplied if you are a beginner but if you have more experience, please use your own reference and use the lessons as a guide.
Meet Your Teacher
Hi, I’m Ronéi!
(Pronunciation: It’s Ron-A, not Ron-B. Lol.)
Learning to paint can feel overwhelming. I’ve been there. I was creative my whole life. Pencil drawing came easy to me but when it came to acrylic painting, I was completely overwhelmed. I knew what I wanted my painting to look like but couldn’t figure out how to make it happen. My paintings looked amateur and flat. Then my husband gave me a one-on-one course with a seasoned artist. The mystery of painting vanished in a few classes. She taught me the tips and tricks she had taken years to perfect. I want to be that teacher for you.
I promise you will have many “aha moments” as we work through the material. You’ll be saying things like, “Wow, so that’s how you do it! That’s easier than I thought.” And learning online means you can learn at your own pace, on your own schedule.
One of my favorite sayings is, “How do you eat an elephant? Answer…one bite at a time!” I’ll teach you step-by-step techniques that take the overwhelm out of painting. You’ll learn to create beautiful layered landscape paintings that have depth and GLOW.
So, let’s take the mystery of painting away, come paint with me!